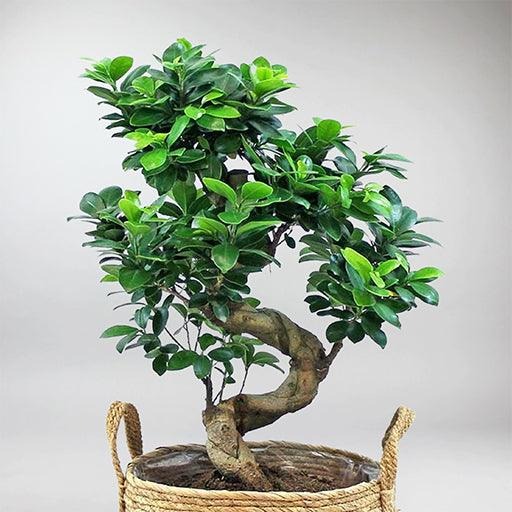
Bonsai is the art of growing miniature trees in containers, combining horticultural techniques with artistic expression. Growing a bonsai tree from scratch requires patience and careful attention to detail, starting with selecting the right tree species and progressing through pruning, wiring, and maintenance to create a visually stunning, long-lasting work of art. This guide breaks down the essential steps to help beginners successfully cultivate their own bonsai tree.
Table of Contents
- Choosing the Right Tree Species
- Starting Bonsai Trees from Seeds or Seedlings
- Selecting the Right Container and Soil
- Pruning and Shaping a Bonsai Tree
- Wiring a Bonsai Tree for Shape and Design
- Watering and Fertilizing Your Bonsai Tree
- Repotting and Root Pruning a Bonsai Tree
- Seasonal Care for your Bonsai Tree
- Tools Needed for a Successful Bonsai Tree
Choosing the Right Tree Species
Selecting the right tree species is the foundation of growing a successful bonsai. Beginners should focus on species that are hardy, adaptable, and forgiving of mistakes as they learn the basics of bonsai care.
Ideal Species for Beginners
Ficus (Ficus spp.): A popular indoor bonsai option, ficus trees are tolerant of low humidity and irregular watering, making them ideal for beginners.
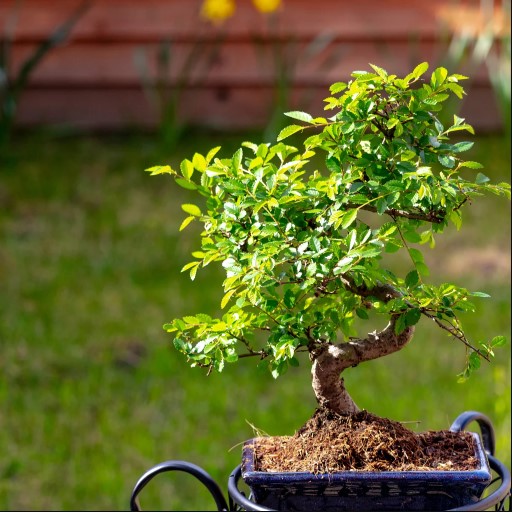
Chinese Elm (Ulmus parvifolia): A versatile species that thrives both indoors and outdoors, it is known for its small leaves and quick adaptability to pruning.
Juniper (Juniperus spp.): A classic outdoor bonsai species, junipers are easy to shape and resilient to various climates.
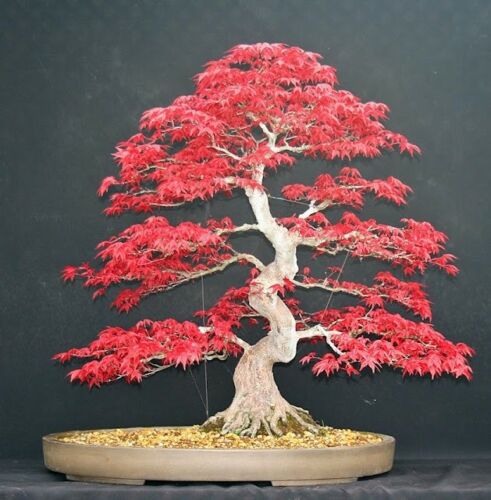
Japanese Maple (Acer palmatum): A deciduous species prized for its stunning foliage, ideal for outdoor growth in temperate climates.
Boxwood (Buxus spp.): A hardy evergreen with dense foliage that responds well to shaping.
Factors to Consider
- Climate Compatibility
- Choose a species suited to your local climate. For example, tropical trees like ficus require warm, stable temperatures, while temperate species like junipers or maples need seasonal changes to thrive.
- If growing outdoors, ensure the species can withstand your region’s temperature extremes.
- Indoor vs. Outdoor Growth
- Indoor Bonsai: Species like ficus and jade (Crassula ovata) perform well indoors, as they can tolerate lower light levels and controlled environments.
- Outdoor Bonsai: Species such as pine, juniper, and maple require exposure to natural light and seasonal variations to maintain health.
- Growth Characteristics
- Opt for trees with smaller leaves or needles, as they create a more proportionate appearance when scaled down.
- Fast-growing species can be ideal for learning, as they allow quicker results when practicing pruning and shaping techniques.
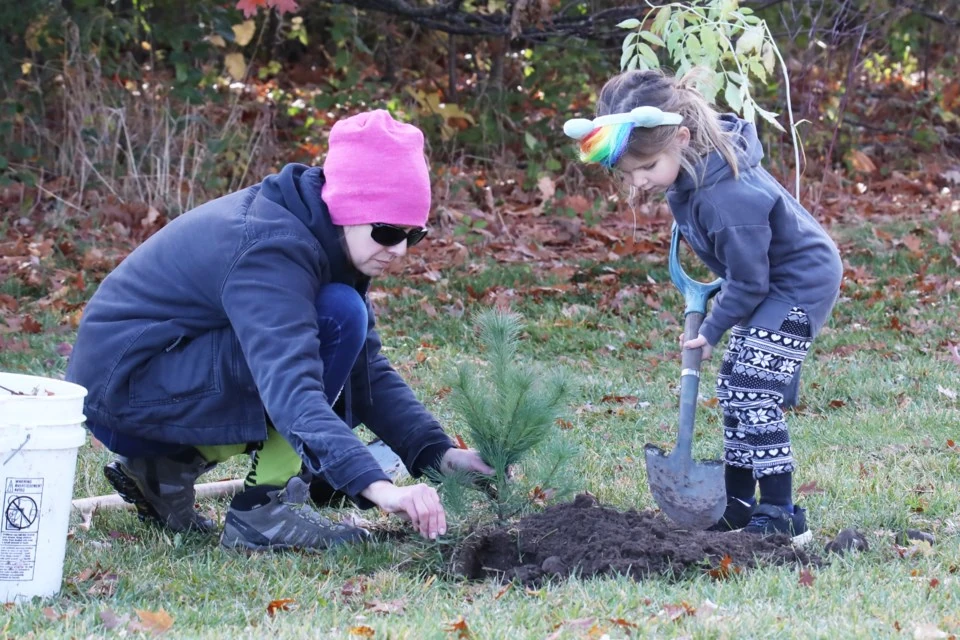
Starting Bonsai Trees from Seeds or Seedlings
Deciding whether to grow your bonsai tree from seeds or to start with a young seedling is a crucial step in your bonsai journey. Both approaches have unique advantages and challenges, which depend on your goals, experience, and patience level.
Pros and Cons of Seeds vs. Nursery Stock
Seeds
- Pros:
- Allows complete control over the tree’s development from the very beginning.
- Offers a deeper understanding of the tree’s growth process.
- Provides a wider range of species choices.
- Cons:
- Requires significant time, often several years, before the tree is ready for shaping.
- Higher failure rate due to the delicate nature of seedlings.
Seedlings (Nursery Stock)
- Pros:
- Speeds up the process, as the tree is already established.
- Easier for beginners who want quicker results and a more forgiving start.
- Readily available at nurseries, often with mature root systems.
- Cons:
- Limited control over the initial growth and shaping.
- Nursery stock may require extensive pruning and root work to transition into bonsai.
Preparing Seeds for Germination
If you decide to grow your bonsai from seeds, proper preparation is essential for successful germination:
- Seed Selection
- Choose seeds from species that are suitable for bonsai and compatible with your growing conditions (e.g., Japanese maple, juniper, or pine).
- Ensure seeds are fresh and sourced from reputable suppliers.
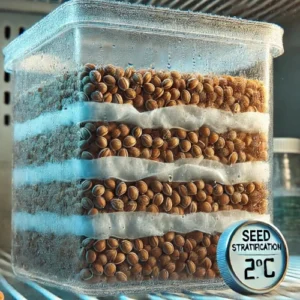
- Stratification
- Some species require stratification, a process that mimics natural winter conditions to break seed dormancy.
- Place seeds in a damp medium (e.g., sand or peat moss) and store them in the refrigerator for the required duration (typically 4–12 weeks).
- Scarification
- For species with hard seed coats, scarification may be necessary to encourage germination.
- Methods include soaking seeds in hot water for 12–24 hours or gently filing the seed coat.
- Sowing the Seeds
- Use a well-draining bonsai soil mix in shallow trays or pots.
- Plant seeds according to their depth requirements (usually 2–3 times the seed’s diameter).
- Keep the soil moist but not waterlogged, and maintain appropriate temperature and light levels based on the species.
- Patience and Monitoring
- Germination can take weeks to months, depending on the species. Monitor for sprouting and provide gentle care as seedlings emerge.
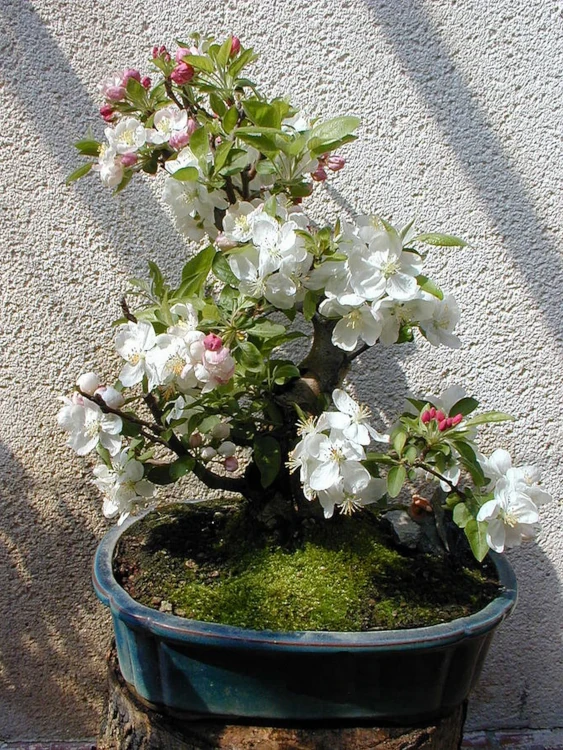
Selecting the Right Container and Soil
The container and soil you choose play a crucial role in the health and aesthetics of your bonsai tree. Proper drainage, root space, and soil composition are essential for maintaining healthy growth while supporting the tree’s miniature form.
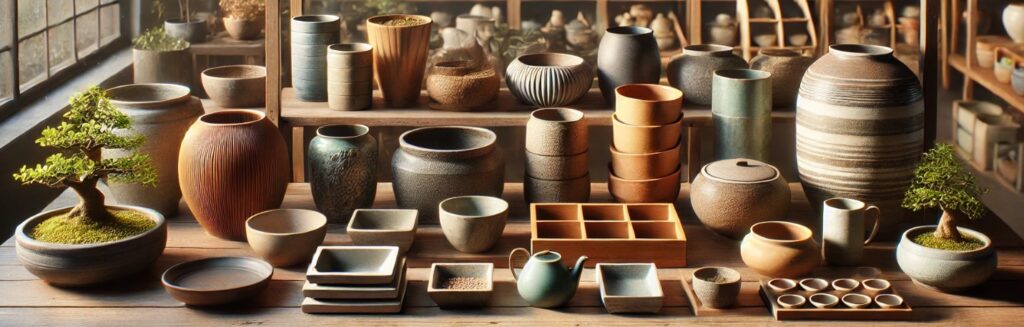
Proper Bonsai Containers
- Characteristics of Bonsai Containers
- Drainage Holes: Essential for preventing waterlogging, which can lead to root rot.
- Size: The container should provide adequate space for root growth but remain proportionate to the tree’s size.
- Material: Common materials include ceramic, clay, and plastic. Ceramic and clay pots are preferred for their durability and aesthetic appeal.
- Choosing the Right Style
- Shape: Rectangular, oval, or round containers are popular. The shape should complement the tree’s design (e.g., tall, straight trees suit rectangular pots, while flowing, curved designs fit oval pots).
- Color: Neutral tones like brown, gray, or unglazed finishes highlight the tree’s natural beauty without overshadowing it.
- Container Depth
- Shallow containers are traditional in bonsai but must still accommodate the tree’s root system. Overly shallow pots can lead to stress, especially for beginners who may overwater.
Soil Mixes for Optimal Bonsai Tree Growth
| Soil Mix for Deciduous Trees | Supports trees like maples and elms, which need balanced moisture and aeration. | 50% akadama, 25% pumice, 25% lava rock. |
| Soil Mix for Evergreen Trees | Suitable for species like junipers and pines, which require better drainage. | 60% akadama, 30% pumice, 10% lava rock. |
| Repotting Frequency | Refreshes soil nutrients and prevents root compaction. | Every 2–3 years, depending on tree growth and soil condition. |
- Key Soil Properties
- Drainage: Bonsai soil must allow water to flow freely to prevent root rot.
- Aeration: A loose soil structure ensures oxygen reaches the roots.
- Moisture Retention: The soil should hold enough water to keep the tree hydrated without becoming soggy.
- Common Bonsai Soil Components
- Akadama: A hard-baked clay that retains water and provides structure. Ideal for most tree species.
- Pumice: A lightweight volcanic rock that improves drainage and aeration.
- Lava Rock: Adds durability and supports healthy root growth.
- Organic Matter: Such as pine bark or compost, to retain moisture and nutrients. Use sparingly to avoid compaction.
- Soil Mix Recommendations
- For deciduous trees: Use a balanced mix of 50% akadama, 25% pumice, and 25% lava rock.
- For evergreen trees: Increase drainage with 60% akadama, 30% pumice, and 10% lava rock.
- Adjust the ratios based on your local climate (e.g., use more moisture-retentive components in dry regions).
- Repotting and Soil Replacement
- Replace the soil every 2–3 years to refresh nutrients and prevent root compaction.
- During repotting, trim roots as necessary to maintain the tree’s small size.
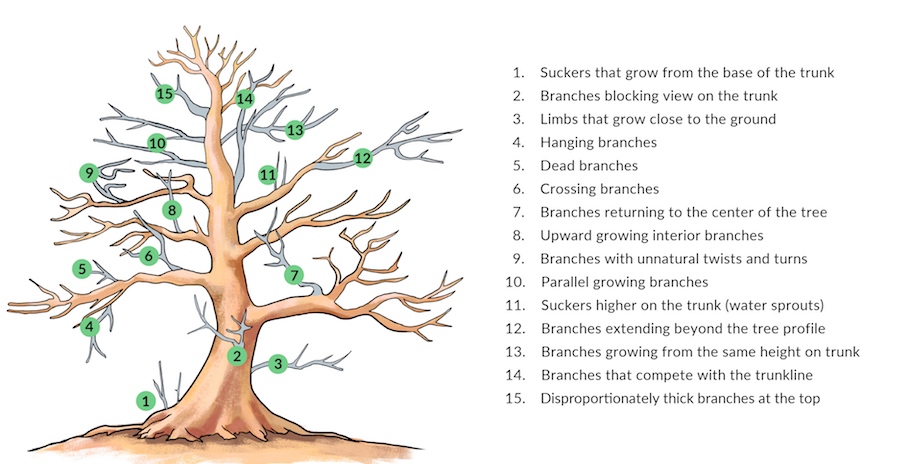
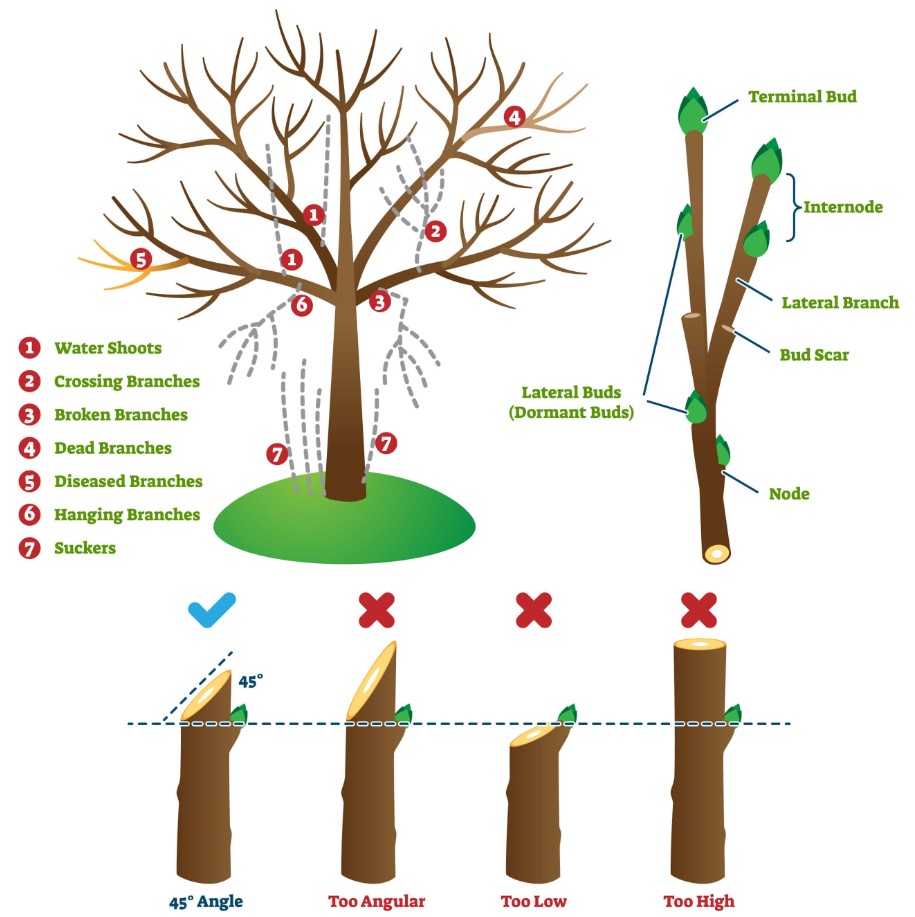
Pruning and Shaping a Bonsai Tree
Pruning is the cornerstone of bonsai artistry, combining horticultural skill with creative vision. It involves controlling the tree’s growth while enhancing its miniature appearance. This section covers the techniques and timing needed for both structural and aesthetic pruning.
Techniques for Structural and Aesthetic Pruning
- Structural Pruning
- Purpose: Establishes the primary framework of the bonsai, including the trunk and main branches.
- Steps:
- Identify and remove branches that are dead, crossing, or growing too close together.
- Focus on creating a tapered trunk with strong lower branches and finer upper branches.
- Remove large roots that disrupt the tree’s miniature proportion or container fit.
- Tools Needed: Sharp pruning shears or concave cutters for clean cuts that heal quickly.
- Aesthetic Pruning
- Purpose: Shapes the tree to enhance its visual appeal and align with traditional bonsai styles (e.g., formal upright, slanting, or cascade).
- Steps:
- Thin out dense foliage to expose the branch structure.
- Remove upward- or downward-facing shoots to maintain horizontal branch growth.
- Trim back to two or three leaf pairs on branches to control size and encourage finer branching.
- Common Techniques:
- Pinching: Hand-pluck new shoots to refine branch growth and maintain proportions.
- Defoliation: Remove some or all leaves on deciduous species to promote smaller, finer foliage.
When and How to Prune
- Timing
- Dormant Season (Winter): Ideal for structural pruning, as the tree’s growth slows, and the branch framework is more visible.
- Growing Season (Spring/Summer): Best for aesthetic pruning and routine maintenance. Trim back new growth regularly to maintain shape.
- Species Considerations:
- Deciduous trees like maples respond well to early spring pruning.
- Evergreens like junipers can be pruned throughout the growing season, but avoid heavy cuts during extreme heat or cold.
- How to Prune
- Preparation:
- Sterilize tools to prevent the spread of diseases.
- Observe the tree’s natural growth pattern and determine which branches to keep or remove.
- Execution:
- Make angled cuts just above a bud or node to encourage new growth in the desired direction.
- Use concave cutters for larger branches to minimize scarring.
- Apply cut paste or sealant to larger wounds to promote healing and prevent infection.
- Preparation:
- Aftercare
- Keep the tree in a shaded or protected area for a few weeks after significant pruning to reduce stress.
- Water and fertilize moderately, avoiding overfeeding, which can lead to excessive growth.
- Wiring for Shaping
- Pruning works in tandem with wiring to shape branches. Use aluminum or copper wire to bend branches into the desired position, ensuring the wire is not too tight to avoid scarring. Check wiring periodically and remove it once the branch holds its new shape.
By mastering pruning and shaping, you guide your bonsai tree’s growth and design, achieving a balance between nature and artistry.
Wiring a Bonsai Tree for Shape and Design
Wiring is a crucial technique for shaping bonsai trees, allowing you to guide branches into desired positions and create dynamic, artistic forms. It requires precision and care to avoid damaging the tree. This section covers the fundamentals of wiring and best practices for minimizing harm.
Basics of Wiring Branches
- Purpose of Wiring
- Shapes the tree’s branches and trunk to achieve traditional bonsai styles or unique designs.
- Encourages branches to grow in specific directions to improve balance and symmetry.
- Types of Wire
- Aluminum Wire: Ideal for beginners and deciduous trees. Easy to manipulate and remove.
- Copper Wire: Stronger and better for conifers. Requires more experience to handle effectively.
- Choosing Wire Thickness
- The wire should be roughly one-third the thickness of the branch you’re shaping.
- Use thinner wire for finer branches and progressively thicker wire for sturdier sections.
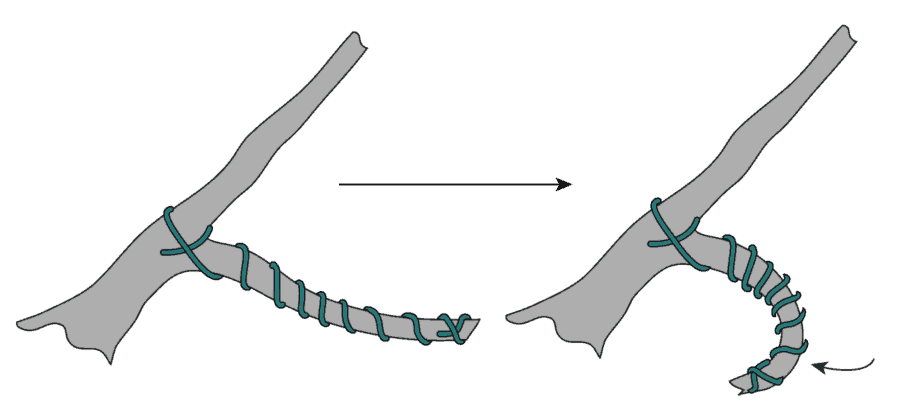
- Steps for Wiring
- Preparation:
- Begin wiring during the growing season when branches are flexible.
- Ensure branches are pruned to a manageable size before wiring.
- Technique:
- Anchor the wire by starting at the base of the trunk or a larger branch.
- Wrap the wire at a 45-degree angle in a spiral pattern, maintaining even spacing.
- Use one piece of wire to shape two adjacent branches when possible (dual wiring).
- Gently bend the wired branch into the desired position.
- Preparation:
Tips to Avoid Damaging the Tree
- Timing and Monitoring
- Apply wiring when the tree is actively growing but avoid periods of extreme heat or cold.
- Check wires every few weeks to ensure they don’t cut into the bark as the branch thickens.
- Avoid Over-tightening
- The wire should be snug but not constrict the branch. Test flexibility before applying pressure.
- Protective Measures
- Use raffia or tape to wrap fragile branches before applying wire to prevent cracking or scarring.
- Avoid wiring newly pruned or weakened branches, as they are more prone to breakage.
- Removal Techniques
- Always cut the wire off with small wire cutters instead of unwinding it to avoid damaging the bark.
- Remove the wire once the branch holds its new position, typically after a few months for most species.
- Common Mistakes to Avoid
- Using the wrong wire type: Aluminum for conifers can break, while copper on deciduous trees may scar easily.
- Over-wiring: Wiring every branch at once can stress the tree. Focus on key sections first.
- Forgetting to monitor: Leaving wires on too long can cause irreversible damage to the bark and branches.
Advanced Wiring Techniques
- For experienced growers, wiring the trunk or creating jins (deadwood features) can enhance artistic expression. However, these techniques require caution and advanced knowledge.
Wiring is both a technical and creative process, and with practice, you can sculpt your bonsai tree into a masterpiece while preserving its health.
Watering and Fertilizing Your Bonsai Tree
Proper watering and fertilization are essential for maintaining the health and vitality of your bonsai. These practices need to be tailored to the specific requirements of your tree species, container size, and environment. This section outlines how to establish a watering routine and select the right fertilizer.
Establishing a Watering Routine
- Understanding Your Bonsai’s Needs
- Factors Affecting Watering Frequency:
- Tree species (e.g., tropical bonsai require more frequent watering).
- Container size and soil type (smaller containers and fast-draining soil dry out quickly).
- Climate and season (higher watering needs during hot or windy conditions).
- Signs of Proper Watering:
- Soil should remain moist but not soggy.
- Leaves should appear healthy and vibrant without signs of wilting or yellowing.
- Factors Affecting Watering Frequency:
- Best Practices for Watering
- Water thoroughly until it drains out of the bottom of the pot.
- Check the soil daily; water when the topsoil feels slightly dry to the touch.
- Avoid watering on a fixed schedule—adjust based on observation and conditions.
- Use a fine-nozzle watering can or spray bottle to avoid disturbing the soil.
- Common Watering Mistakes to Avoid
- Overwatering: Leads to root rot and fungal infections. Ensure proper drainage.
- Underwatering: Causes wilting and leaf drop. Never let the soil completely dry out.
- Inconsistent Watering: Can stress the tree, affecting growth and health.
Fertilizer Types and Schedules
- Understanding Bonsai Nutrient Needs
- Bonsai trees require regular feeding due to limited nutrients in small containers.
- Key nutrients:
- Nitrogen (N): Encourages leaf and branch growth.
- Phosphorus (P): Promotes root development and flowering.
- Potassium (K): Enhances overall health and resistance to stress.
- Types of Fertilizers
- Organic Fertilizers: Slow-release and improve soil quality over time. Examples: bonsai-specific pellets or cakes.
- Chemical Fertilizers: Provide precise nutrient control and faster results. Examples: liquid or granulated formulas.
- Balanced vs. Specialized Fertilizers:
- Use balanced formulas (e.g., 10-10-10) for general health.
- Use high-phosphorus formulas (e.g., 3-10-10) during flowering or fruiting stages.
- Fertilization Schedule
- Spring and Summer: Fertilize every 2–4 weeks for most bonsai, as these are active growing seasons.
- Autumn: Reduce frequency as growth slows, focusing on root-strengthening formulas.
- Winter: Avoid fertilizing deciduous species while dormant; minimal feeding for evergreens.
- Application Tips
- Dilute liquid fertilizers to half-strength to avoid overfeeding.
- Apply fertilizer after watering to prevent root burn.
- Avoid fertilizing stressed or recently pruned trees.
- Common Fertilization Mistakes
- Over-fertilizing: Causes salt buildup and can damage roots. Flush soil periodically.
- Using inappropriate formulas: Ensure the fertilizer matches the tree’s growth stage and species.
- Ignoring soil pH: Some species (e.g., azaleas) require acidic conditions for optimal nutrient uptake.
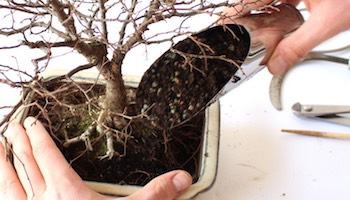
Repotting and Root Pruning a Bonsai Tree
Repotting and root pruning are essential practices for maintaining a healthy bonsai tree. These techniques help to refresh the soil, promote healthy root growth, and prevent the tree from becoming root-bound. In this section, we’ll go over the best times to repot, how to perform the procedure, and tips for maintaining strong, balanced roots.
When and How to Repot
- When to Repot
- Timing:
- Spring: The best time to repot is in early spring, just before the tree starts actively growing. This allows the tree to recover from the stress of root pruning.
- Every 2-3 years: Most bonsai trees need repotting every 2-3 years, but the frequency depends on species and container size. Younger trees with faster growth may need more frequent repotting, while older trees may require less.
- Signs it’s Time to Repot:
- Roots begin to emerge from the drainage holes.
- The tree has outgrown its pot and is top-heavy or unstable.
- The soil becomes compacted and doesn’t drain properly.
- Timing:
- How to Repot
- Step-by-Step Guide:
- Prepare the new pot: Choose a container that is slightly larger than the current one, with drainage holes to ensure proper water flow.
- Remove the tree from its pot: Gently ease the bonsai out by tapping or loosening the sides. Be careful not to damage the roots.
- Examine the roots: Trim away any dead, diseased, or damaged roots using sharp scissors or root cutters.
- Root pruning: Trim back long, unruly roots to encourage new, fibrous root growth. Do not remove more than 25-30% of the roots in a single session.
- Refresh the soil: Remove old soil, especially if it has broken down or become compacted. Place a layer of fresh, well-draining bonsai soil at the bottom of the new pot.
- Position the tree: Place the tree back into the pot and adjust the root system to fit. Fill in with fresh soil, ensuring it settles around the roots without air pockets.
- Water thoroughly: After repotting, water the tree well to help the soil settle and eliminate any trapped air.
- Step-by-Step Guide:
Steps for Healthy Root Maintenance
- Pruning the Roots
- Why Prune the Roots: Regular root pruning helps maintain the balance between the tree’s top growth and the root system, preventing the tree from becoming root-bound and promoting new, healthy root growth.
- When to Prune:
- During the repotting process, ideally in spring.
- If the tree has been in the same pot for several years, root pruning may be necessary even if it hasn’t outgrown its container.
- How to Prune:
- Use root-cutting scissors or sharp shears to remove dead, rotting, or damaged roots.
- Trim back the longest roots to encourage branching and help the tree establish a new, fine root system.
- Maintaining a Healthy Root System
- Well-Draining Soil: Use a specialized bonsai soil mix to ensure that the roots don’t sit in water, which could cause rot.
- Aeration: Periodically check for compacted soil and refresh it as needed to maintain good airflow around the roots.
- Watering After Repotting: Water carefully after repotting, keeping the tree in a shaded or protected location until it has fully adapted. Water again only when the soil feels dry to the touch to prevent overwatering.
- Avoiding Root Stress
- Don’t Over-prune: Only trim what is necessary. Removing too many roots at once can severely stress the tree.
- Avoid Root Damage: Be gentle when handling the roots to avoid breaking or bruising them, which can lead to infections or stunted growth.
- Signs of Root Problems
- Root Rot: If you notice a foul odor, discolored or mushy roots, it may be a sign of root rot. Remove infected roots and ensure your tree is not sitting in water for extended periods.
- Slow Growth: If the tree shows slow growth despite regular care, it may be root-bound. Repotting and pruning the roots will help stimulate new growth.
Seasonal Care for your Bonsai Tree
Seasonal changes bring different challenges and requirements for your bonsai tree. By adapting your care routines for each season, you can ensure your tree remains healthy year-round. This section covers essential seasonal care tasks and how to protect your bonsai from extreme weather conditions.
Adapting Care Routines for Different Seasons
- Spring: Revitalizing Growth
- Increased Growth Rate: As the tree enters its active growing phase, the need for water and nutrients increases. Begin fertilizing regularly and ensure the tree receives sufficient light.
- Repotting and Pruning: Early spring is the ideal time to repot and prune your bonsai, as it allows the tree to recover before the growing season takes off.
- Watering Needs: Ensure the soil is kept moist, but avoid overwatering. The warmer temperatures lead to quicker soil drying, especially for small pots.
- Summer: Maximizing Health and Vitality
- Higher Watering Demands: Summer heat accelerates water evaporation, so check the soil more frequently and water thoroughly when the top layer feels dry.
- Shading and Protection: If your bonsai is kept outdoors, consider providing partial shade during the hottest part of the day to prevent sunburn on the leaves. Tropical bonsai, in particular, may benefit from full shade.
- Fertilizing: Continue to feed the tree with balanced, diluted fertilizer every 2-4 weeks to support strong, healthy growth.
- Pest Control: Keep an eye out for pests, as warmer weather encourages insect activity. Regularly check for signs of infestation and treat promptly with appropriate methods.
- Autumn: Preparing for Dormancy
- Decreasing Watering Needs: As the weather cools, reduce watering. Trees in the process of going dormant require less water, but don’t let the soil dry out completely.
- Fertilizing Adjustment: Begin to decrease fertilization frequency, as the tree slows down its growth. Focus on fertilizers that promote root health during this phase.
- Pruning for Structure: Autumn is an excellent time to remove dead or damaged branches and begin preparing the tree for winter.
- Positioning: Bring your bonsai indoors or move it to a sheltered location if the temperatures are dropping.
- Winter: Protecting and Conserving Energy
- Minimized Growth and Care: During the winter months, the tree enters a period of dormancy or slowed growth. Watering should be reduced, as the tree requires minimal moisture.
- Indoor Care: If your bonsai is kept indoors, ensure it receives adequate light, either from natural sunlight or grow lights. Keep the temperature stable, avoiding drafts or sudden temperature changes.
- Cold Protection for Outdoor Bonsai: For outdoor bonsai, protect them from freezing temperatures by either moving them to a cold frame, greenhouse, or insulating their pots with materials like burlap or foam.
- Avoid Fertilizing: Do not fertilize during the winter, as the tree is not actively growing and cannot process nutrients.
Protecting Bonsai from Extreme Weather
- Heat Protection
- Summer Heat: When temperatures soar, protect your bonsai from excessive sun exposure. Use shade cloth, move the tree to a cooler spot, or place it under taller plants to provide some shade.
- Watering Considerations: During hot spells, water in the early morning or late afternoon to prevent rapid evaporation. Avoid watering during the hottest part of the day.
- Humidity Needs: Bonsai thrive in humidity, which can be difficult to maintain indoors during hot, dry months. Consider using humidity trays or misting the tree lightly to increase moisture levels.
- Cold Protection
- Winterizing Outdoor Bonsai: Before the first frost, move your outdoor bonsai to a sheltered spot, such as a garage, shed, or cold frame, where it can be protected from freezing temperatures.
- Insulating Pots: If bringing your bonsai inside is not an option, insulate the pot by wrapping it in burlap or foam to prevent the roots from freezing. For large bonsai, burying the pot in the ground or covering it with mulch can also help protect it from extreme cold.
- Avoid Sudden Temperature Fluctuations: Whether inside or outside, avoid sudden temperature changes, as this can shock the tree and cause stress.
Troubleshooting Common Problems
Even with the best care, bonsai trees can face various challenges that can affect their health and appearance. In this section, we’ll address some of the most common problems encountered in bonsai cultivation, including pests, diseases, overgrowth issues, and how to revive stressed or neglected trees.
Pests and Diseases
- Common Pests
- Aphids: These small, soft-bodied insects can sap nutrients from leaves, causing distortion and yellowing. To treat, remove aphids by spraying the tree with insecticidal soap or a diluted neem oil solution.
- Spider Mites: Often found on the undersides of leaves, spider mites cause yellow spots and webbing. Increase humidity around the tree, as dry conditions promote mite infestations. Use miticide or neem oil for control.
- Mealybugs: Mealybugs appear as cotton-like clumps on stems and leaves. Remove them manually with a cotton swab dipped in rubbing alcohol or use insecticidal soap.
- Scale Insects: Scale insects are hard, round pests that attach to branches or leaves, causing yellowing or leaf drop. Scrape them off with a soft brush and treat with insecticidal soap.
- Fungus Gnats: These pests are common in moist soil. Reduce watering to allow the soil to dry out, and consider using beneficial nematodes or yellow sticky traps to control larvae.
- Common Diseases
- Root Rot: Root rot is caused by overwatering or poor drainage. Symptoms include yellowing leaves, mushy roots, and foul-smelling soil. To treat, remove affected roots, repot the bonsai in fresh soil, and improve drainage.
- Powdery Mildew: This fungal disease appears as white, powdery spots on leaves. Reduce humidity, improve air circulation, and treat with fungicides or a mixture of water and baking soda.
- Leaf Spot Disease: Leaf spots are caused by fungal or bacterial infections. Remove affected leaves and avoid overhead watering to reduce the spread of the disease.
- Blight: This bacterial or fungal infection causes wilting, browning, and premature leaf drop. Prune affected areas, sanitize pruning tools between cuts, and avoid overcrowding your bonsai.
Overgrowth Issues
- Excessive Growth
- Problem: Bonsai trees can become too leggy or grow out of proportion if not regularly pruned. This can occur due to improper light conditions or neglecting regular pruning.
- Solution:
- Prune Regularly: Trim back new growth to maintain the desired shape and size. Focus on cutting back long shoots and keeping the tree compact.
- Provide Adequate Light: Make sure your bonsai receives enough light—ideally 4-6 hours of direct sunlight daily for outdoor bonsai and artificial grow lights for indoor bonsai.
- Pinch New Growth: Pinching back soft new growth regularly can encourage branching and prevent the tree from becoming leggy.
- Leggy Growth
- Problem: If your bonsai is growing long, spindly branches with large gaps between leaves, it may be a sign that it’s not getting enough light or has been neglected in its training.
- Solution:
- Increase Light: Ensure your bonsai is placed in a location where it receives sufficient sunlight. If indoors, use supplemental grow lights.
- Prune Back Overgrown Branches: Trim back leggy growth to encourage bushier development. Regular pruning helps to strengthen the tree and prevent uneven growth.
Reviving Stressed or Neglected Bonsai
- Signs of Stress
- Yellowing Leaves: Yellowing leaves are often a sign of nutrient deficiency, overwatering, or underwatering.
- Solution: Ensure you’re watering properly—avoid letting the soil dry out completely or remain too wet. Provide balanced fertilizer during the growing season.
- Wilting or Drooping Leaves: Wilting or drooping can occur from root rot, insufficient water, or too much direct sunlight.
- Solution: Check the roots for signs of rot, trim any damaged roots, and repot if necessary. Adjust the location to avoid extreme heat or direct sunlight during midday hours.
- Leaf Drop: Excessive leaf drop can result from pests, diseases, or poor growing conditions.
- Solution: Inspect for pests, remove affected leaves, and adjust care routines, such as reducing watering frequency or improving light exposure.
- Yellowing Leaves: Yellowing leaves are often a sign of nutrient deficiency, overwatering, or underwatering.
- Steps to Revive a Neglected Bonsai
- Assess the Roots: Gently remove the tree from its pot to check the root system. Trim any dead or rotting roots and repot the tree into fresh soil.
- Proper Watering: Ensure your tree is receiving the right amount of water. If the soil is too dry, give it a thorough watering, and if it’s too wet, allow it to dry out before watering again.
- Pruning Back Excessive Growth: If your tree has become too leggy or has overgrown, prune it back to encourage new growth and improve the overall shape.
- Optimize Growing Conditions: Adjust light, temperature, and humidity levels according to the specific needs of your tree species.
- Providing Nutrients
- Fertilization: After correcting any immediate issues, start a regular fertilization schedule with a balanced, slow-release fertilizer or liquid feed to promote healthy regrowth. Avoid over-fertilizing, which can damage the tree.
- Support During Recovery: During the recovery process, ensure that your bonsai is in a low-stress environment. Avoid wiring or heavy pruning until the tree has regained its strength.
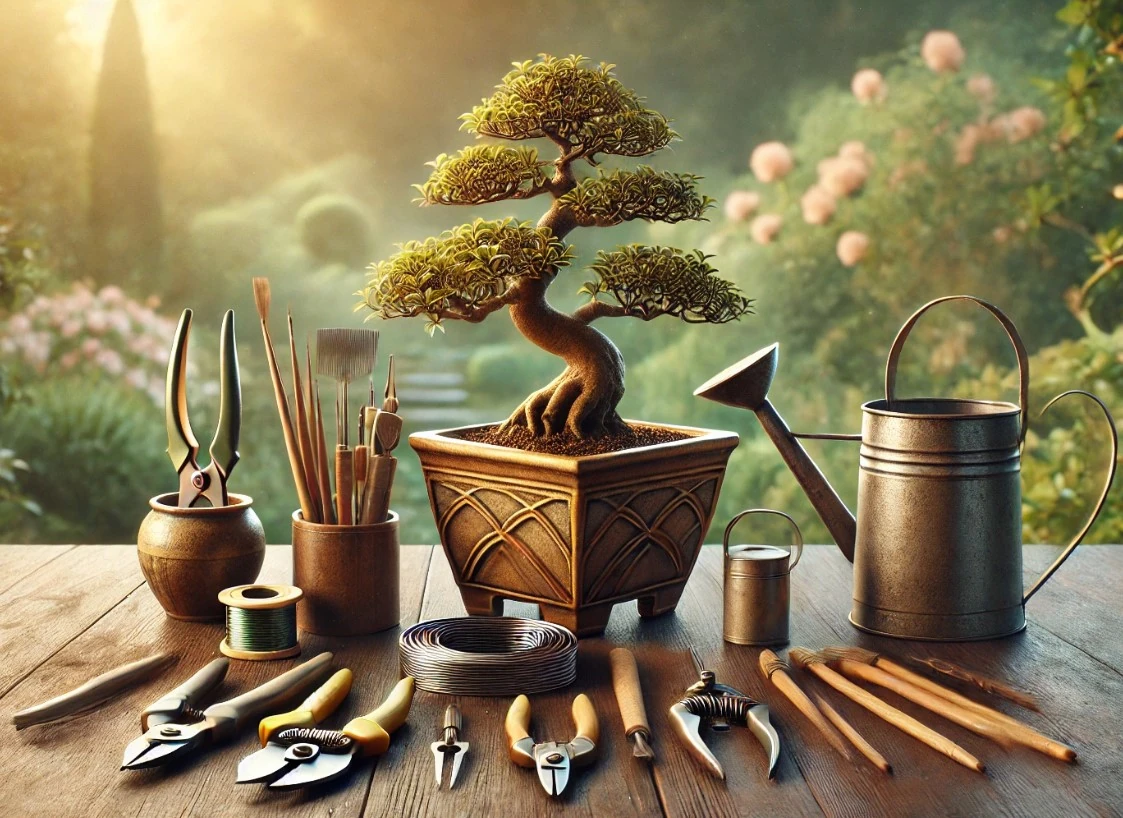
Tools Needed for a Successful Bonsai Tree
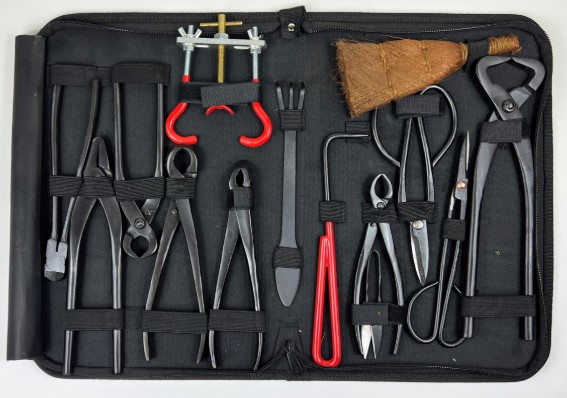
To successfully raise and maintain a healthy bonsai, you’ll need a variety of specialized tools. These tools will help you perform essential tasks like pruning, wiring, repotting, and maintaining the overall health of your bonsai. Below is a comprehensive list of tools that every bonsai enthusiast should have in their collection.
Basic Bonsai Tree Tools
- Pruning Shears (Bonsai Scissors)
- Purpose: Essential for trimming branches, leaves, and roots. These sharp, precision shears allow for clean cuts, which are crucial for healthy growth.
- Types: Small scissors for fine trimming, larger ones for thicker branches.
- Concave Cutters
- Purpose: Used for cutting thicker branches, particularly when you want to remove a branch at the trunk level. They create a concave cut that heals better than a straight cut.
- Benefit: Helps minimize scarring and promotes faster healing of the tree.
- Wire Cutters
- Purpose: To trim excess wire after shaping the branches. These cutters prevent damage to your tree and ensure a clean finish when removing wiring.
- Types: Available in straight or angled forms for different uses.
- Bonsai Wire
- Purpose: Used for shaping branches and trunk to achieve the desired design. It comes in different thicknesses and materials, with aluminum and copper being the most common.
- Types: Soft aluminum wire for beginners and copper wire for more experienced bonsai practitioners.
- Root Rake
- Purpose: Helps untangle and clean the roots during repotting. It ensures the roots are properly spread and encourages healthy growth.
- Types: Typically a hand tool with multiple prongs to gently rake through the root mass.
- Bonsai Potting Tray
- Purpose: A flat tray used during repotting to hold the soil and prevent spills. It provides a clean surface to work on while planting.
- Bonsai Pots
- Purpose: Specially designed pots with drainage holes, typically shallow to accommodate the small root systems of bonsai trees.
- Types: Ceramic pots, plastic pots, and occasionally wooden containers.
- Chopstick
- Purpose: Used during repotting to spread soil and settle it around the roots. It helps ensure that the roots are well-covered and there are no air pockets.
Additional Tools for Advanced Bonsai Tree Care
- Jin Plier
- Purpose: Used for creating jins (deadwood features) by twisting and bending branches to expose the inner wood.
- Benefit: Allows for artistic shaping of the tree’s structure by creating weathered, aged features.
- Grafting Tool
- Purpose: Used for grafting branches onto the trunk of the tree to change the shape or improve the tree’s design.
- Benefit: It helps to create seamless grafts for design purposes or to repair damaged trees.
- Bonsai Tweezers
- Purpose: For removing small, delicate branches, weeds, or leaves that need fine handling. Also used for cleaning up dead foliage or debris from the tree.
- Soil Scooper
- Purpose: For transferring soil into the bonsai pot during repotting. It ensures that the soil is evenly distributed and allows you to control the depth of the planting.
- Watering Can with Fine Spout
- Purpose: A watering can with a long, fine spout is essential for watering bonsai, providing even distribution of water without disturbing the soil surface.
- Humidity Tray
- Purpose: Used to maintain humidity around the bonsai tree, especially in indoor environments where dry air is common.
- Benefit: Helps to mimic the tree’s natural environment and keeps the bonsai hydrated.
- Pruning Knife
- Purpose: A sharp knife used for detailed trimming, particularly when pruning small or delicate branches that require more precision than shears can offer.
- Lopper
- Purpose: Larger pruning tool used for thicker branches that are too robust for regular pruning shears.
- Benefit: Helps to manage older trees or those with thicker growth.
Additional Care Tools
- Moisture Meter
- Purpose: Measures the moisture content of the soil to help ensure the tree isn’t overwatered or underwatered.
- Benefit: Useful for ensuring your bonsai is getting the proper care, especially for beginners.
- Grow Lights
- Purpose: Supplemental lighting for bonsai trees grown indoors or in low-light areas.
- Benefit: Provides the necessary light for healthy growth when natural sunlight is insufficient.
- Pest Control Sprays
- Purpose: Safe, natural pest control products like neem oil, insecticidal soap, or other non-toxic sprays to treat pest infestations.
- Benefit: Keeps your bonsai free from pests without using harsh chemicals.
- Root Saw
- Purpose: A small, fine-toothed saw used to cut through large roots during repotting or root pruning.
- Benefit: Essential for cutting thick roots without damaging the tree.
- Watering Tray
- Purpose: A shallow tray to place the bonsai pot in when watering, especially for trees that require bottom watering.
- Benefit: Ensures the soil is adequately hydrated and that the water is absorbed slowly through the drainage holes.