
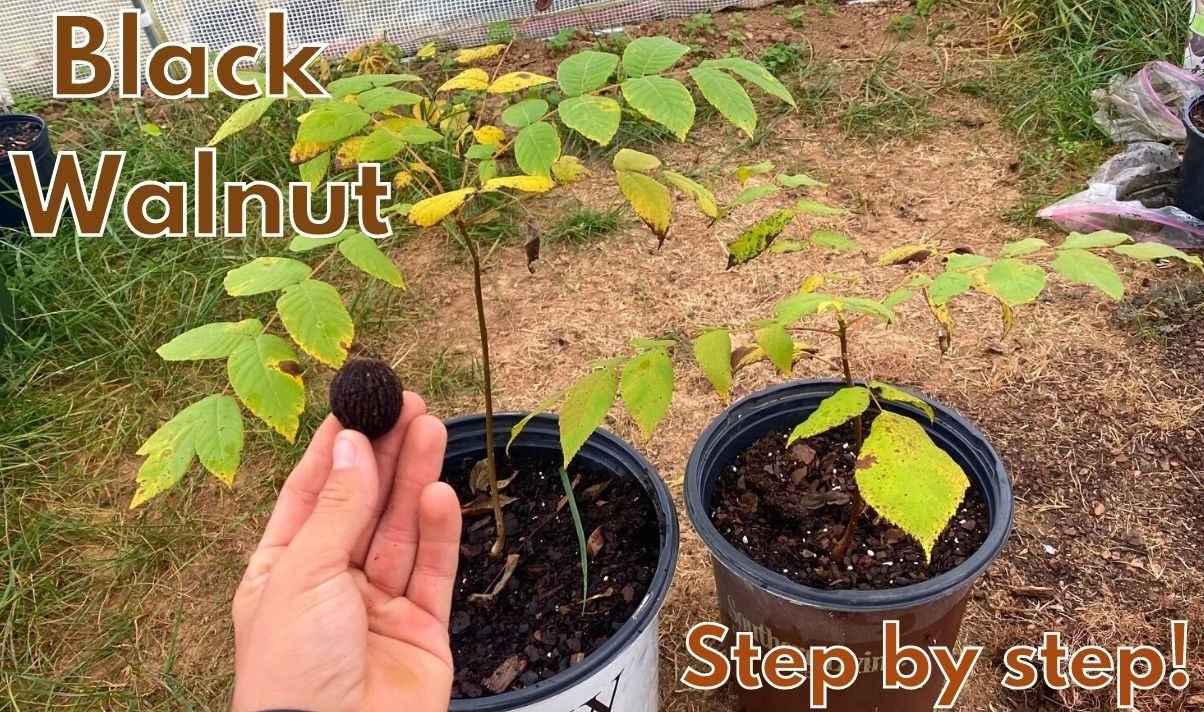
Growing black walnut trees from seed is both rewarding and potentially lucrative, as black walnut wood is among the most valuable timbers in the world, fetching prices of $5 to $10 per board foot, with exceptional logs selling for thousands of dollars. Prized for its deep color, strength, and workability, this wood is a cornerstone in fine furniture, gunstocks, and veneers. Beyond its economic allure, black walnut trees also provide nutritious nuts and support a diverse ecosystem. Whether for personal satisfaction or long-term investment, this guide will walk you through the steps to successfully grow black walnut trees from seed.
Why Grow Black Walnut Trees from Seed?
Growing black walnut trees from seed is more than just a horticultural endeavor—it’s a long-term investment with significant rewards. You may wonder, how much is a black walnut tree worth? The answer depends on its size and quality, but mature black walnut trees can fetch anywhere from $1,000 to $15,000 each, with veneer-grade trees commanding the highest prices. Black walnut wood is highly prized for its strength, workability, and rich, dark appearance, making it one of the most valuable hardwoods in the world.
Beyond their economic value, black walnut trees also produce delicious, nutrient-dense nuts, a staple for culinary uses and wildlife alike. Growing from seed offers additional benefits: you can select and nurture trees best suited to your local conditions, ensuring healthier, more resilient specimens than those bought as nursery stock. Plus, the process of germinating and raising black walnut trees from seed fosters a deep connection to the natural world and the legacy these magnificent trees provide. Whether for their financial potential, ecological contributions, or personal satisfaction, growing black walnut trees from seed is a venture that pays off in many ways.
Collecting and Preparing Black Walnut Seeds
How to Identify Ripe Walnuts
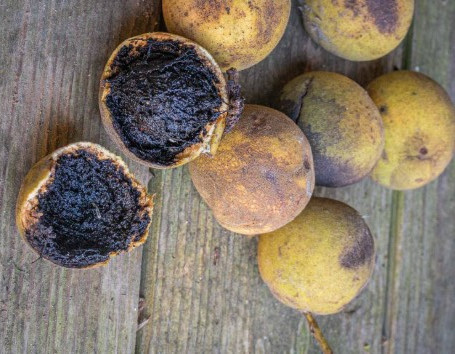
Ripe black walnuts are ready to harvest in early to mid-autumn. Look for walnuts with green husks that have started yellowing, softening, or developing dark patches. These nuts often fall to the ground naturally when ripe. Collect walnuts quickly after they drop to minimize exposure to pests, mold, or decay. Avoid nuts that remain on the tree late into the season or those with completely black, mushy husks, as these are likely overripe or unusable.
Proper Handling and Husk Removal
After collection, removing the thick, messy husks is essential. Here’s how to do it efficiently:
- Place the walnuts on a firm surface, such as concrete covered by a tarp, and gently roll or step on them to loosen the husks.
- Peel the husks away by hand (wear gloves to protect against staining) or use a scraper for stubborn sections.
- Rinse the de-husked nuts thoroughly in water to remove any pulp.
During rinsing, test for viability by placing the seeds in a bucket of water. Discard any floaters, as they’re usually hollow or damaged, and keep the sinkers, which are more likely to germinate. Once cleaned, allow the seeds to air dry briefly before moving on to the next step in the process Stratification.
Seed Stratification: Mimicking Winter Conditions

Stratification is a critical step in growing black walnut trees from seed, as it replicates the natural winter dormancy period required to break seed dormancy and trigger germination. Without stratification, your seeds are unlikely to sprout, even in ideal growing conditions.
Why Stratification is Essential
In the wild, black walnut seeds fall in autumn, remain dormant through winter, and germinate in spring when conditions improve. This dormancy is nature’s way of protecting seeds from sprouting too soon. By stratifying seeds, you mimic this winter period, signaling the seed that it’s time to grow. The chilling process softens the seed coat and activates enzymes needed for germination. Without stratification, even viable seeds will fail to sprout.
Step-by-Step Stratification Guide
- Timing and Preparation:
Begin stratification in late fall or early winter, ideally 90-120 days before your last expected frost. By the time spring arrives, the seeds will be ready to plant. - Gather Materials:
- A container or plastic bag with a sealable lid.
- A damp medium like sand, peat moss, or a mix of both. Avoid soaking wet mediums to prevent rot—moist but not dripping is ideal.
- Layering the Seeds:
- Place a layer of damp sand or peat moss at the bottom of your container.
- Add a layer of cleaned and viable black walnut seeds (previously tested for viability by sinking).
- Cover the seeds with another layer of damp sand or peat moss. Continue layering until all seeds are buried, ensuring they don’t touch one another directly.
- Chilling Period:
- Store the container in a refrigerator at a temperature of 33–41°F (0.5–5°C). A basement or garage can also work, but consistent temperatures are crucial. Avoid freezing the seeds or exposing them to fluctuating warmth.
- Keep the medium damp throughout the stratification period by checking weekly. Add a small amount of water if the medium feels dry.
- Duration:
- Stratify the seeds for at least 90 days. The chilling process ensures the seeds are fully prepared for germination. Patience is key during this time, as rushing the process can lead to poor results.
- Post-Stratification:
Once the stratification period is complete, remove the seeds from the refrigerator and plant them immediately in prepared soil or pots. Be gentle when handling them, as they may begin showing signs of germination, such as cracks or emerging roots.
Planting the Seeds: Timing and Techniques
After stratification, planting your black walnut seeds properly ensures they have the best start. This step focuses on choosing the right time, soil, and planting technique to maximize growth potential.
When to Plant
The best time to plant black walnut seeds is in early spring, after the risk of frost has passed. Soil temperatures between 50–70°F (10–21°C) are ideal for germination. For those who prefer a natural approach, planting in late fall is also an option, as the winter cold completes any remaining stratification needs.
Choosing the Right Soil and Location
The growth and health of your black walnut trees depend heavily on the conditions of the planting site. Consider the following:
- Sunlight and Space: Choose a location with full sun exposure, ensuring at least 6–8 hours of sunlight daily. Space seeds 30–40 feet apart for nut production or closer (12–15 feet) for timber, where straighter, taller growth is desired.
- Soil Quality: Black walnuts thrive in deep, well-drained loamy soils with a pH of 6.0–7.5. A soil test can confirm if amendments are needed.
- Juglone Sensitivity: Keep in mind the tree’s natural production of juglone, a chemical that can inhibit the growth of sensitive plants nearby. Avoid planting near gardens or species like tomatoes, peppers, or apples.
Planting Techniques
- Preparing the Site: Clear the area of weeds and debris to reduce competition for nutrients. Loosen the soil for better root penetration.
- Planting Depth: Place seeds 2–3 inches deep, place them on their side. Cover lightly with soil, avoiding compaction.
- Spacing: Adjust spacing based on your goals: wider for nut production and closer for timber.
- Labeling: Mark each planting spot with a stake or tag to monitor germination and simplify future care tasks.
Caring for Black Walnut Seedlings
Proper care during the early stages of growth is crucial to ensure your black walnut trees develop into healthy, robust specimens. This section outlines the essentials for nurturing young trees, tackling common challenges, and encouraging long-term success.
Watering, Mulching, and Protecting the Young Trees
- Watering: Black walnut seedlings require consistent moisture, especially during their first growing season. Water deeply once or twice a week, depending on rainfall, ensuring the soil remains moist but not waterlogged. Reduce watering as the tree establishes a deeper root system.
- Mulching: Apply a 2–4 inch layer of organic mulch, such as wood chips or straw, around the base of the seedlings. This helps retain soil moisture, regulate temperature, and suppress weeds. Keep the mulch a few inches away from the trunk to prevent rot and pests.
- Protection: Use tree shelters or wire mesh guards to protect seedlings from browsing animals, such as deer and rabbits. For added security, install fencing around the planting area if wildlife is a persistent problem.
Common Challenges and Solutions
- Weed Competition: Remove weeds regularly to prevent competition for nutrients and water. Avoid using herbicides directly on or near the seedlings, as black walnut trees are sensitive to many chemicals.
- Pests and Diseases: Watch for signs of walnut caterpillars, anthracnose, or root rot. Handpick pests or use natural deterrents. Ensuring proper drainage and airflow can reduce disease risks.
- Juglone Toxicity: Young black walnuts also release juglone, which can harm nearby plants. Maintain a buffer zone between the seedlings and sensitive species.
Encouraging Strong Growth
- Sunlight: Ensure the seedlings receive full sun exposure for at least 6–8 hours a day.
- Fertilization: Avoid over-fertilizing during the first year. If needed, use a low-nitrogen fertilizer in the spring to encourage balanced growth.
- Pruning: Limit pruning to removing damaged or diseased branches. Allow the tree to focus on vertical growth during its early years.
Growing Tips for Long-Term Success
As your black walnut trees mature, implementing proper care and management techniques is key to ensuring their long-term health and productivity. This section covers essential considerations for spacing, pruning, and mitigating the effects of the tree’s naturally occurring juglone toxin.
Spacing and Pruning Considerations
- Spacing for Optimal Growth:
- Black walnut trees require adequate space to grow and thrive. Allow at least 30–40 feet between trees to accommodate their large canopy and extensive root systems.
- For timber production, tighter spacing of 10–15 feet may be used initially to encourage straighter trunks. Trees can then be thinned as they mature to provide additional space.
- Pruning for Form and Health:
- Begin structural pruning during the tree’s early years to encourage a strong central leader and reduce the risk of weak branching.
- Remove low, damaged, or crossing branches annually, ideally in late winter or early spring before bud break.
- Avoid over-pruning, as black walnut trees may become stressed if too much foliage is removed at once. A good rule of thumb is to limit pruning to no more than 25% of the tree’s canopy in a single year.
Managing the Tree’s Toxic Juglone Effect
Black walnut trees release juglone, a chemical that inhibits the growth of many other plants nearby. Understanding and managing this effect can help you maintain a healthy ecosystem around your trees.
- Recognizing Susceptible Plants:
- Common plants affected by juglone include tomatoes, potatoes, peppers, apples, and azaleas. Research the juglone tolerance of any plants you intend to grow near your trees.
- Creating a Buffer Zone:
- Establish a juglone-free zone by planting sensitive species at least 50–60 feet away from mature black walnut trees. Keep in mind that juglone concentrations are highest in the roots and decaying leaves, so distance is critical.
- Planting Juglone-Tolerant Species:
- Opt for companion plants that are resistant to juglone, such as black raspberries, corn, beans, or certain grasses. These plants can coexist with black walnut trees without adverse effects.
- Soil Management:
- Regularly rake and remove fallen leaves, twigs, and husks to minimize juglone accumulation in the soil. Composting walnut debris should be done with caution, as juglone can persist in poorly managed compost piles.