Currants are the hidden gems of the garden—small, glossy berries bursting with flavor and nutrition. Whether you’re whipping up jams, baking pies, or snacking straight from the bush, growing currant bushes is a rewarding adventure. With vibrant hues of black, red, pink, and white, these berries are as stunning as they are versatile.
Packed with vitamin C, antioxidants, and essential minerals, currants are a powerhouse of health benefits. And the best part? They’re surprisingly easy to grow, even for beginners. Let’s dive into the secrets of cultivating these delightful shrubs and turn your garden into a berry paradise.
Choosing the Right Currant Variety
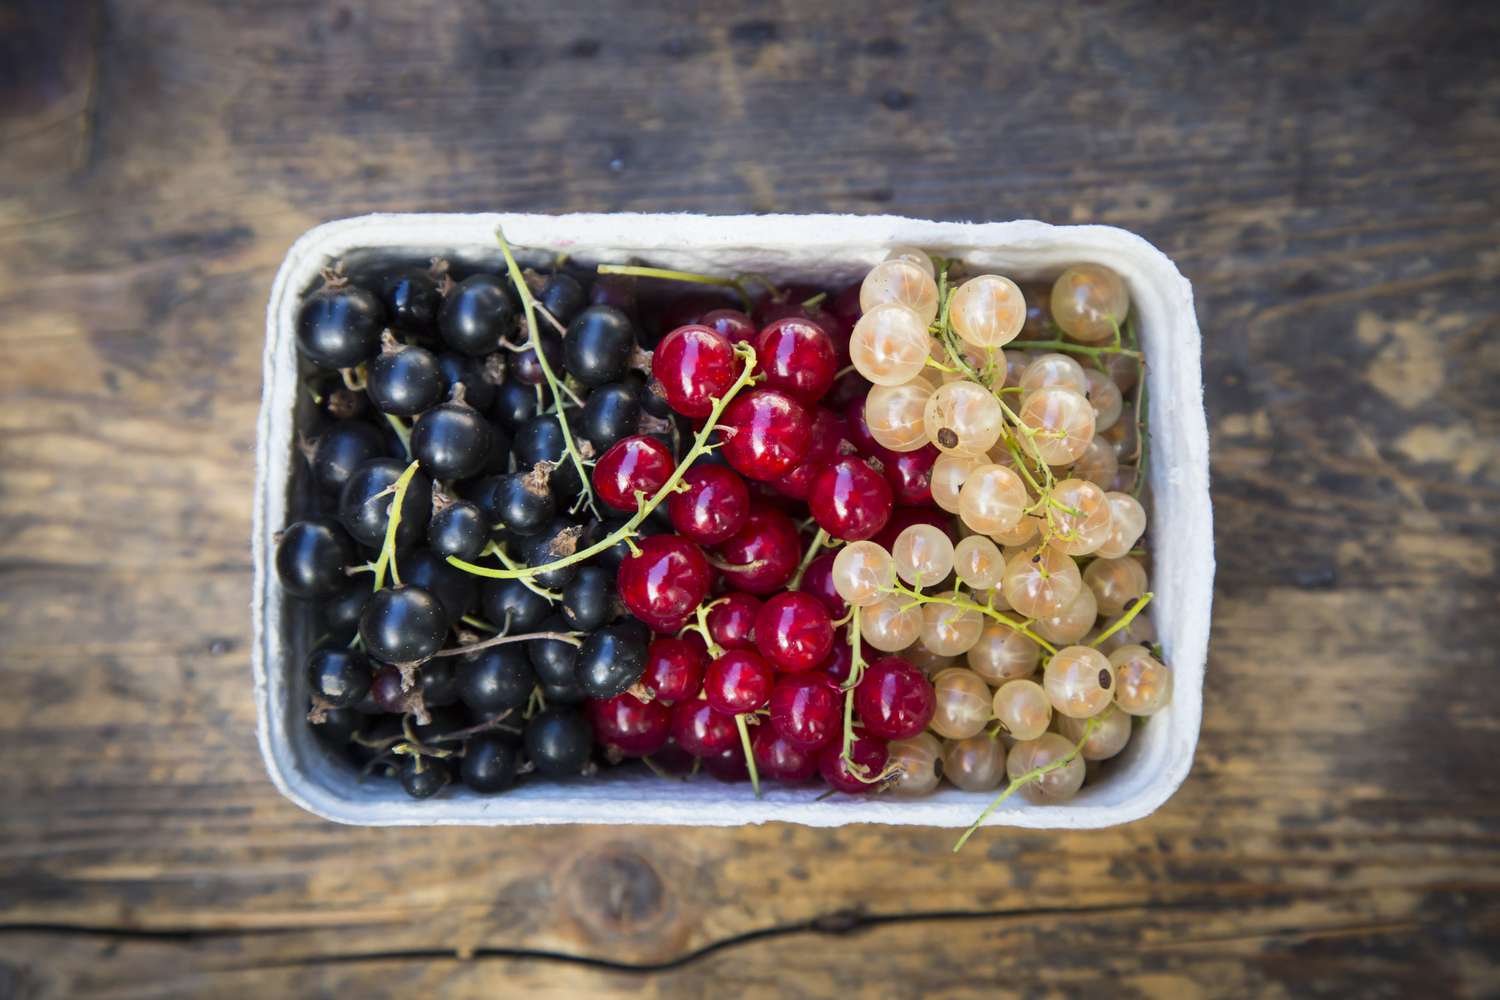
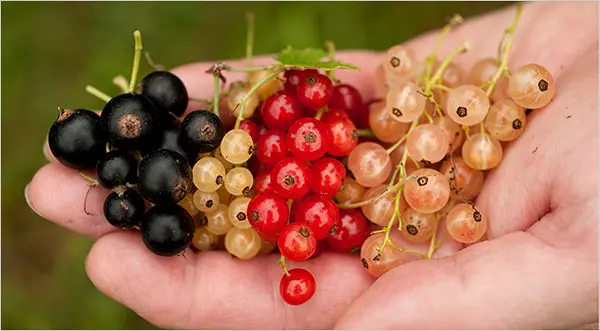
Currants come in four main types, each with its own unique flavor and uses:
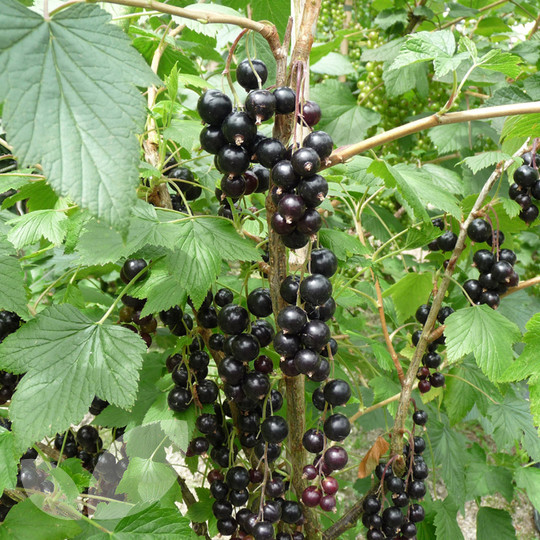
Black Currants (Ribes nigrum)
Black currants are known for their deep, complex flavor with an earthy undertone and a slight tartness. They have a high concentration of antioxidants, vitamin C, and anthocyanins, making them the most nutrient-dense of all currant varieties. Due to their bold taste, black currants are often used in syrups, cordials, and liqueurs like the famous crème de cassis. Their richness also makes them a great addition to savory dishes, pairing well with meats, especially game, and rich sauces.
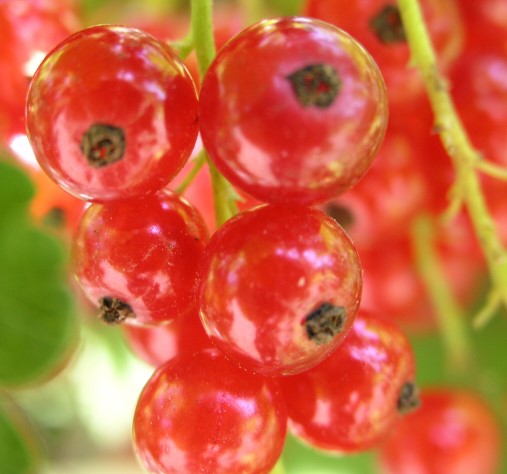
Red Currants (Ribes rubrum)
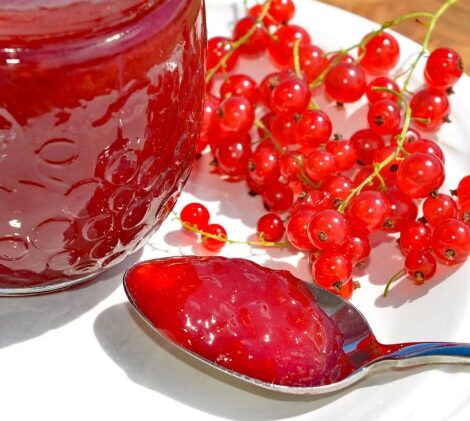
Red currants are the most commonly cultivated variety, prized for their tart and tangy flavor. Their vibrant red hue makes them a striking addition to jellies, sauces, and fruit compotes. Red currants are frequently used in traditional preserves, lending a bright, refreshing acidity that balances out sweetness. They also work well as garnishes in salads, desserts, and even alongside roasted meats, adding a pop of color and a touch of tartness.
White Currants (Ribes sativum)
A naturally occurring variant of red currants, white currants are significantly sweeter and milder in flavor. Their pale, translucent berries offer a delicate taste with a subtle honey-like quality, making them perfect for fresh eating. White currants are excellent in desserts, where their gentle sweetness enhances tarts, sorbets, and cakes. They can also be used to make mild jellies and syrups that complement other fruits without overpowering them.
Pink Currants
Pink currants are a rare and visually stunning variety, with a sweetness that falls between red and white currants. Their soft blush-colored berries have a mild tartness with a pleasant fruity undertone. Because of their unique appearance and balanced flavor, pink currants are often enjoyed fresh or used to create elegant jams, jellies, and decorative garnishes. They are also an attractive addition to fruit salads and summer beverages, where their delicate hue and gentle sweetness shine.
Popular cultivars include ‘Titania’ (black), ‘Red Lake’ (red), ‘White Imperial’ (white), and ‘Pink Champagne’ (pink). These varieties are known for their disease resistance and reliable yields.
Transplanting Currant Bushes: A Step-by-Step Guide
Currants are hardy plants that thrive in cooler climates (USDA zones 3-5). Here’s how to get started:
Timing: When to Plant
For optimal growth, plant bare-root currants in autumn or early spring while the plants are still dormant. This allows them to establish strong roots before active growth begins. Potted currants, on the other hand, can be transplanted at any time of year but will adapt best when planted during the cooler months of spring or fall.
Choosing the Right Location
Currants flourish in a sunny location with well-draining soil. While they can tolerate partial shade, particularly in warmer regions, too much shade may reduce fruit production. Avoid planting them in low-lying areas where water may collect, as soggy conditions can lead to root rot.
Soil Preparation: Creating the Ideal Bed
Currants prefer slightly acidic to neutral soil, ideally with a pH between 5.5 and 7.0. Before planting, enrich the soil by incorporating compost or well-rotted manure into the planting hole. This boosts fertility and helps retain moisture while ensuring proper drainage. A soil test can help determine if any additional amendments are needed.
Spacing: Allowing Room to Grow
To promote good air circulation and prevent disease, space currant bushes 4 to 5 feet apart. This ensures that each plant has enough room to spread its branches and receive adequate sunlight, which is crucial for healthy fruit development.
Planting Depth: Setting Roots for Success
When transplanting, plant currants slightly deeper than they were in their nursery container. This encourages the development of a strong root system and additional shoots from the base. Firm the soil gently around the roots and water thoroughly to help settle the plant into its new home.
Caring for Your Currant Bushes
Once established, currants are relatively low-maintenance. Here’s how to keep them healthy and productive:
1. Watering: Keeping Your Currants Hydrated
Currants have shallow root systems, making them sensitive to drought. Proper watering is essential, especially during dry spells.
- How Much Water?
- Currants need 1-2 inches of water per week, either from rainfall or irrigation.
- Increase watering during hot, dry weather or when the plants are flowering and fruiting.
- When to Water?
- Water in the early morning to allow foliage to dry before evening, reducing the risk of fungal diseases.
- Avoid overhead watering, which can promote mildew. Instead, use a soaker hose or water at the base of the plant.
- Signs of Overwatering or Underwatering:
- Overwatering: Yellowing leaves, root rot, or waterlogged soil.
- Underwatering: Wilting, dry leaves, or poor fruit development.
Pro tip: Mulch around the base of the plant with straw, wood chips, or compost to retain moisture and regulate soil temperature.
2. Fertilizing: Feeding Your Currants for Optimal Growth
Currants are moderate feeders and benefit from regular fertilization to support healthy growth and fruit production.
- When to Fertilize:
- Apply a balanced fertilizer (10-10-10) in early spring, just as new growth begins.
- A second application can be made in early summer if the plants show signs of nutrient deficiency (e.g., pale leaves or stunted growth).
- Organic Options:
- Use compost, well-rotted manure, or organic fertilizers like fish emulsion or bone meal.
- Mulch with compost in spring to provide a slow-release nutrient source.
- Avoid Over-Fertilizing:
- Too much nitrogen can lead to excessive leafy growth at the expense of fruit production. Stick to the recommended amounts and avoid high-nitrogen fertilizers.
3. Pruning: Shaping Your Bushes for Health and Productivity
Pruning is one of the most important aspects of currant care. Proper pruning improves air circulation, reduces disease risk, and encourages higher yields.
- When to Prune:
- Prune during late winter or early spring while the plants are dormant. Avoid pruning in fall, as it can stimulate new growth that may be damaged by frost.
- How to Prune:
- Year 1: After planting, prune young bushes back to 6-8 inches above the ground to encourage strong root development.
- Year 2 and Beyond:
- Remove any dead, damaged, or diseased branches.
- Thin out older wood (stems older than 4 years) to make room for new growth.
- Aim to keep 8-12 healthy stems per plant, focusing on 1-3-year-old wood, which produces the best fruit.
- Cut back lateral branches to 2-3 buds to encourage fruiting spurs.
- Training Options:
- Bush Form: The most common shape, allowing the plant to grow naturally with an open center.
- Standard Form: Train the plant to grow as a single-stemmed tree by removing lower branches and supporting the stem with a stake.
4. Winter Care: Preparing Your Currants for Cold Weather
Currants are hardy plants, but a little winter care can help them thrive.
- Mulching: Apply a thick layer of mulch (straw, leaves, or wood chips) around the base to insulate the roots and protect them from freezing temperatures.
- Pruning: Complete any necessary pruning in late winter to prepare the plants for spring growth.
- Frost Protection: If a late frost is forecast while your plants are flowering, cover them with frost cloth or row covers to protect the buds.
5. Monitoring and Maintenance: Staying Ahead of Problems
Regularly inspect your currant bushes for signs of stress, pests, or disease. Early intervention can prevent small issues from becoming big problems.
- Weekly Checks: Look for discolored leaves, wilting, or unusual growth patterns.
- Soil Testing: Test your soil every 2-3 years to ensure it has the right pH and nutrient levels.
- Record Keeping: Keep a garden journal to track pruning, fertilizing, and pest management activities.
Even the best gardeners face challenges. Here’s how to tackle common currant problems:
- Powdery Mildew: Improve air circulation, mulch the roots, and treat with organic fungicides like sulfur or potassium bicarbonate.
- Aphids and Spider Mites: Introduce beneficial insects like ladybugs or use neem oil to control infestations.
- Wind Damage: Stake young plants and prune regularly to prevent breakage.
Harvesting and Storing Your Currants
The moment you’ve been waiting for! Currants are ready to harvest from mid to late summer. Here’s how to make the most of your bounty:
- Harvesting: Gently snip entire clusters from the stem to avoid damaging the berries. Taste-test white and pink currants for sweetness, while black and red currants should be deep in color and juicy.
- Storing: Fresh currants can be refrigerated for a few days or frozen for up to six months. For longer storage, turn them into jams, jellies, or syrups.
Troubleshooting Common Issues
Currants can attract a few pests, but with proper care, you can keep them under control.
- Common Pests:
- Aphids: Small, sap-sucking insects that distort new growth.
- Solution: Spray with insecticidal soap or neem oil. Introduce beneficial insects like ladybugs.
- Spider Mites: Tiny arachnids that cause yellowing leaves and fine webbing.
- Solution: Increase humidity by misting plants or use a miticide.
- Currant Borers: Larvae that tunnel into stems, causing dieback.
- Solution: Prune and destroy affected stems.
- Aphids: Small, sap-sucking insects that distort new growth.
- Preventative Measures:
- Keep the area around your plants clean and free of debris.
- Encourage beneficial insects by planting companion plants like marigolds, calendula, or dill.
Disease Prevention: Keeping Your Currants Healthy
Currants are susceptible to a few diseases, but good cultural practices can minimize the risk.
- Common Diseases:
- Powdery Mildew: A fungal disease that appears as a white, powdery coating on leaves.
- Solution: Improve air circulation, avoid overhead watering, and treat with sulfur or potassium bicarbonate.
- White Pine Blister Rust: A serious disease that affects both currants and white pine trees.
- Solution: Plant resistant varieties and remove infected plants immediately.
- Leaf Spot: Causes dark spots on leaves, leading to defoliation.
- Solution: Remove and destroy affected leaves, and apply a copper-based fungicide.
- Powdery Mildew: A fungal disease that appears as a white, powdery coating on leaves.
- Preventative Measures:
- Space plants properly to ensure good air circulation.
- Avoid working with plants when they’re wet to prevent the spread of disease.
- Mulch around the base to prevent soil-borne pathogens from splashing onto leaves.
Propagating Currant Bushes
Propagating currant bushes is a rewarding way to expand your berry patch without spending a fortune on new plants. Whether you’re starting from seeds or cuttings, currants are relatively easy to propagate. Below, we’ll explore both methods in detail, along with tips to ensure success.
1. Propagating Currants from Seeds
While growing currants from seeds is less common than using cuttings, it’s a viable option if you’re patient and enjoy the process. Here’s how to do it:
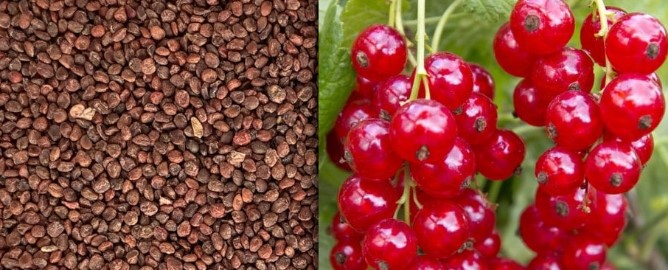
1: Collecting Seeds
- Harvest ripe currants and separate the seeds from the pulp. Rinse the seeds thoroughly to remove any remaining fruit residue.
- Spread the seeds on a paper towel and allow them to dry completely.
2: Cold Stratification
- Currant seeds require a period of cold stratification to break dormancy and germinate. This mimics the natural winter conditions they need to sprout.
- Place the seeds in a moist medium, such as damp sand, peat moss, or a paper towel, and seal them in a plastic bag or container.
- Store the container in the refrigerator (not the freezer) for 2-3 months. Check periodically to ensure the medium stays moist but not waterlogged.
3: Sowing the Seeds
- After stratification, sow the seeds in seed trays or small pots filled with a well-draining seed-starting mix.
- Plant the seeds about ¼ inch deep and lightly cover them with soil.
- Water gently and place the trays in a cool, bright location (a cold frame or unheated greenhouse works well).
4: Germination and Care
- Germination can take 2-4 weeks, but some seeds may take longer. Be patient!
- Once seedlings emerge, provide plenty of light and keep the soil moist.
- When the seedlings have developed 2-3 true leaves, transplant them into larger pots or a nursery bed.
- Grow the seedlings for 1-2 years before transplanting them to their final location.
Pros of Seed Propagation:
- It’s an inexpensive way to grow new plants.
- You can experiment with creating new varieties.
Cons of Seed Propagation:
- It’s a slow process, taking 2-3 years to produce fruit.
- Seed-grown plants may not be true to the parent plant’s characteristics.
2. Propagating Currants from Hardwood Cuttings
Hardwood cuttings are the most popular and reliable method for propagating currants. This method is faster than growing from seeds and ensures the new plants are genetically identical to the parent plant.
1: Timing
- The best time to take hardwood cuttings is in late fall or early winter, after the plant has gone dormant but before the ground freezes.
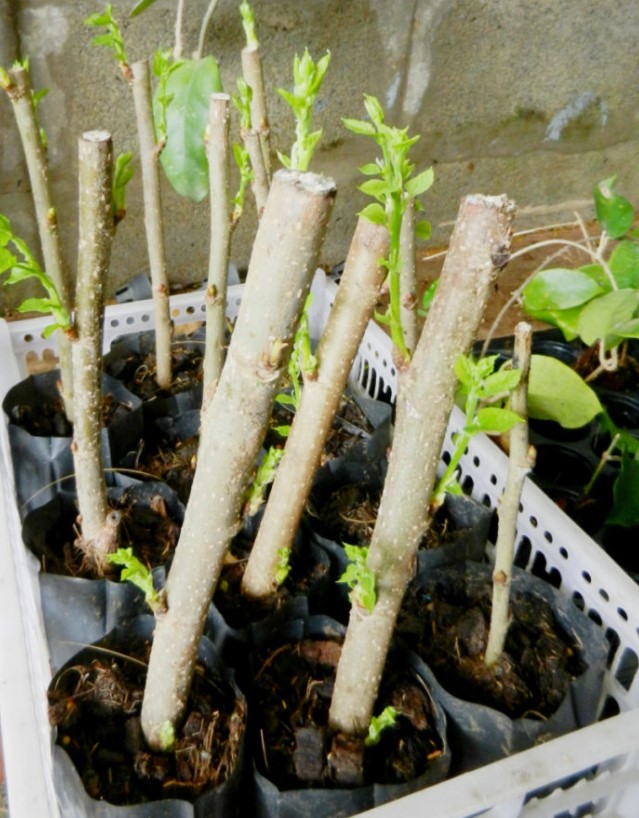
2: Selecting and Preparing Cuttings
- Choose healthy, disease-free stems from the current year’s growth. Look for stems that are pencil-thick and about 10-12 inches long.
- Using sharp, clean pruning shears, make a straight cut just below a bud at the base of the stem and a slanted cut just above a bud at the top. This helps you identify the top and bottom of the cutting and encourages rooting.
- Remove all but the top 2-3 buds to focus the plant’s energy on root development.
3: Rooting the Cuttings
- Dip the base of each cutting in rooting hormone powder or gel to encourage root growth. While not strictly necessary, this step can improve success rates.
- Plant the cuttings in a prepared nursery bed or large pots filled with a mix of sand and compost. Insert the cuttings 6-8 inches deep, leaving only the top buds exposed.
- Space the cuttings 6-12 inches apart to allow room for growth.
4: Caring for the Cuttings
- Water the cuttings thoroughly after planting and keep the soil moist but not waterlogged.
- In spring, the cuttings will begin to develop roots and new shoots. Be patient—this process can take 6-12 months.
5: Transplanting
- Once the cuttings have established a strong root system and are showing vigorous growth, they’re ready to be transplanted to their final location.
- Choose a sunny spot with well-drained soil and follow the planting guidelines outlined earlier in the article.
Pros of Hardwood Cuttings:
- Faster than seed propagation—cuttings can produce fruit in 1-2 years.
- Ensures the new plants are identical to the parent plant.
Cons of Hardwood Cuttings:
- Requires access to a healthy parent plant.
- Success rates can vary depending on environmental conditions.
3. Layering: An Alternative Propagation Method
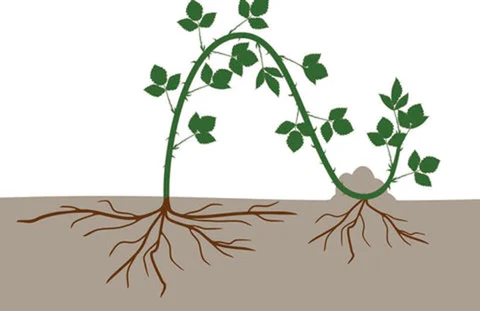
Layering is another simple way to propagate currants, especially if you want to avoid disturbing the parent plant.
1: Select a Low Branch
- Choose a healthy, flexible stem that can be bent to the ground without breaking.
2: Prepare the Stem
- Make a small cut or scrape the bark on the underside of the stem where it will touch the soil. This encourages rooting.
3: Bury the Stem
- Dig a shallow trench near the parent plant and bury the prepared section of the stem, leaving the tip exposed.
- Secure the buried section with a rock or wire to keep it in place.
4: Care and Separation
- Keep the soil moist and wait for roots to develop, which can take 6-12 months.
- Once the new plant is well-rooted, cut it free from the parent plant and transplant it to its final location.
Delicious Currant Recipes
Currants are as versatile in the kitchen as they are in the garden! Try these simple recipes to make the most of your harvest.
Red Currant Jelly
Ingredients:
- 4 cups red currants
- 2 cups sugar
- ½ cup water
Instructions:
- Simmer currants and water for 10 minutes, mashing the berries.
- Strain through a fine sieve or cheesecloth.
- Return the juice to the pot, add sugar, and boil for 10 minutes.
- Pour into sterilized jars and seal.
Black Currant Syrup
Ingredients:
- 3 cups black currants
- 2 cups water
- 1 cup sugar
- 1 tbsp lemon juice
Instructions:
- Simmer currants and water for 15 minutes, then strain.
- Return the juice to the pot, add sugar and lemon juice, and boil until slightly thickened.
- Cool and store in the fridge. Perfect for drizzling over pancakes or mixing into drinks!
Final Thoughts
Growing currant bushes is a rewarding endeavor that combines beauty, flavor, and nutrition. Whether you’re a novice gardener or a seasoned pro, these versatile shrubs are sure to become a cherished part of your garden. So why not give currants a try? With a little care and patience, you’ll be harvesting your own jewel-toned berries in no time.