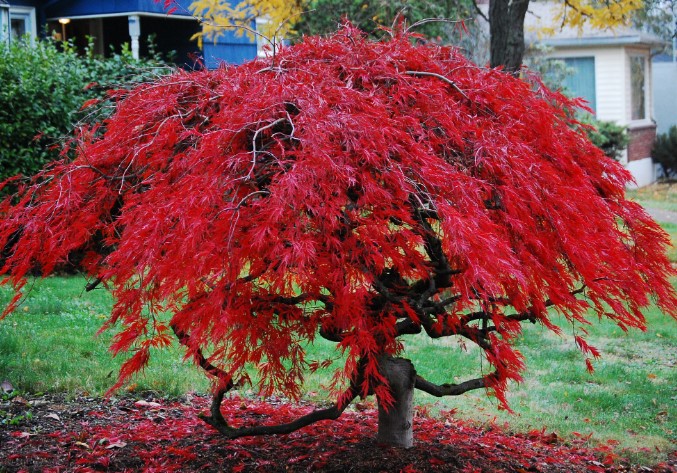
Growing a Japanese Maple from seed is a rewarding process that requires patience and attention to detail. Though it may take several years to reach its full beauty, starting from seed offers the opportunity to nurture a unique tree with a personalized touch. This guide will walk you through the steps involved in germinating and cultivating your Japanese Maple from seed, ensuring success along the way.
Preparing the Seeds for Germination
Before planting Japanese Maple seeds, it’s essential to properly prepare them for germination. The process begins with collecting fresh seeds from a healthy tree, typically in the fall. After harvesting, remove any dried husks or debris and rinse the seeds gently. Soak the seeds in water for 24 hours to help soften the seed coat and improve germination rates. During this soaking period, discard any seeds that float, as they are likely non-viable. Once soaked, the seeds are ready for the next step: stratification.
Stratification Process
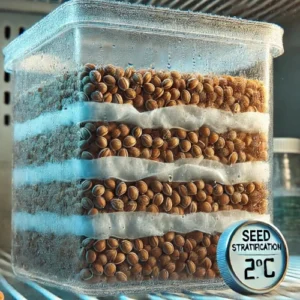
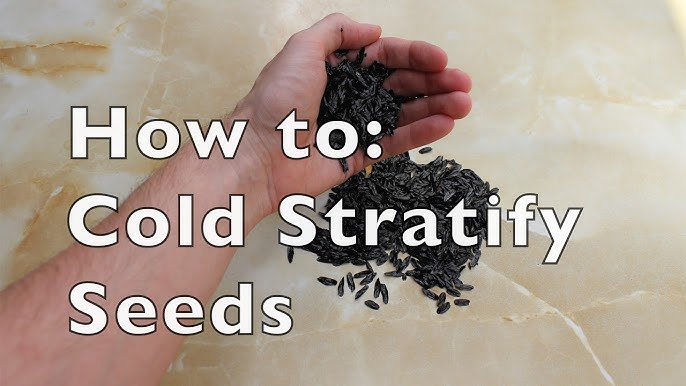
Stratification is a critical step in the Japanese Maple seed germination process, mimicking the natural winter conditions seeds would experience in the wild. To begin, place the soaked seeds in a damp, sterile medium like sand, peat moss, or perlite. Mix the seeds into the medium and store them in a plastic bag or container. Then, refrigerate the container at temperatures between 34°F (1°C) and 41°F (5°C) for about 90 to 120 days. During this period, the cold temperatures will break the seed’s dormancy and trigger the germination process. Check periodically to ensure the medium remains moist but not soggy, and to monitor for mold or fungal growth. Once the stratification period is complete, the seeds will be ready for planting.
Planting the Seeds
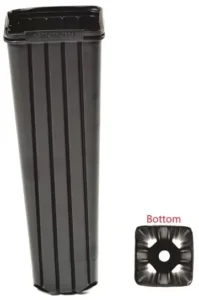
Once the stratification period is over, it’s time to plant your Japanese Maple seeds. Choose a well-draining potting mix, ideally one designed for seed starting or a blend of peat moss, perlite, and vermiculite. Fill tall pots or deep tree seed trays with the prepared mix, leaving a small gap at the top. Gently press the stratified seeds into the surface of the soil, planting them about 1/4 inch deep. Lightly cover the seeds with a thin layer of the same mix. Water gently to moisten the soil, ensuring it’s evenly moist but not waterlogged. Place the pots in a warm, bright location with indirect light. Ideal temperatures for germination are between 65°F (18°C) and 75°F (24°C). Keep the soil consistently moist, but avoid overwatering to prevent rot. Germination can take anywhere from 2 to 8 weeks, so be patient during this period.
Caring for Seedlings
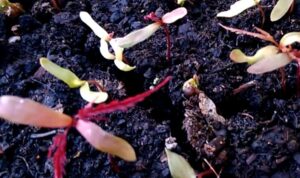
Once your Japanese Maple seeds have germinated, providing proper care is crucial for the development of strong, healthy seedlings. This section will guide you through the steps to ensure their growth and survival.
Light Requirements
Japanese Maple seedlings need bright but indirect light for healthy growth. Place them in a well-lit area, such as near a window that doesn’t receive direct sunlight. Direct sunlight can scorch young leaves, especially for delicate seedlings. If natural light is insufficient, consider using grow lights to provide additional light, ideally around 12-16 hours per day. Avoid placing seedlings in dark or overly shaded locations, as this can cause them to become leggy and weak.
Watering and Humidity
Maintaining consistent moisture is essential, but it’s equally important not to overwater. Keep the soil moist, but not soggy. The best way to water is to gently mist or water from the bottom, allowing the seedlings to absorb moisture through drainage holes in the container. Ensure that any excess water drains away to prevent root rot.
During dry spells, you can increase humidity by placing a humidity dome or plastic wrap over the container (make sure there are small vents for airflow). This helps create a greenhouse-like environment, which is beneficial for young seedlings. Once seedlings are more established, you can gradually reduce the humidity.
Temperature Considerations
Seedlings thrive in temperatures between 65°F (18°C) and 75°F (24°C). Avoid placing them in areas with drafts, heating vents, or sudden temperature fluctuations. If the temperature dips below 60°F (15°C), growth may slow down or stop altogether. A consistent, warm environment will encourage steady growth. If growing indoors during colder months, consider using a heat mat underneath the pots to maintain optimal temperature levels.
Fertilization
Once your Japanese Maple seedlings develop their first set of true leaves, they will benefit from light feeding. Use a diluted, balanced liquid fertilizer (such as a 10-10-10) at half strength. Fertilize every 4-6 weeks, ensuring the seedlings aren’t overfed, which can cause weak growth. Avoid fertilizing during the initial germination phase, as the seedling’s energy comes from the seed itself.
When seedlings are ready for transplanting into larger pots or outdoor conditions, you can start using a slow-release fertilizer, which provides nutrients over an extended period.
Air Circulation and Thinning
As your seedlings grow, ensure there is adequate air circulation around them to prevent fungal issues. If your seedlings are in crowded containers or trays, thin them out by carefully removing the weakest plants. This helps reduce competition for light, water, and nutrients, allowing the strongest seedlings to flourish.
If seedlings become excessively tall or leggy, it could indicate insufficient light. In such cases, move them to a brighter location or add artificial grow lights to encourage sturdier, bushier growth.
Pest and Disease Management
Young seedlings are vulnerable to pests and diseases. Regularly check for common issues such as aphids, spider mites, or fungal infections. If you notice pests, gently wash them off with a spray of water or use an insecticidal soap. Ensure good airflow around the seedlings to prevent mold or mildew, which thrives in stagnant, humid environments.
For fungal diseases, such as damping-off, avoid overwatering and make sure the soil mix is well-draining. If the seedlings are affected by disease, remove any infected plants immediately to prevent spreading.
Transplanting to Outdoor Conditions
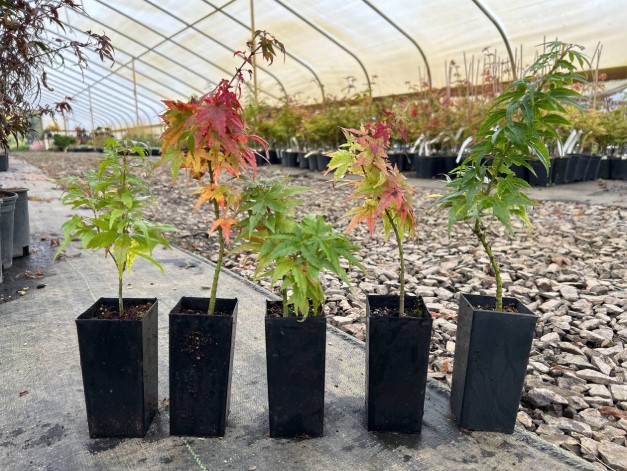
Transplanting your Japanese Maple seedlings to the outdoors is an exciting step, but it requires careful timing and preparation to ensure the young trees thrive in their new environment. Follow these steps for a successful transition from pots to the garden or landscape.
Timing the Transplant
The best time to transplant Japanese Maple seedlings is in early spring or fall when temperatures are moderate. Avoid transplanting during extreme weather conditions such as intense summer heat or the cold of winter, as this can stress the young trees. Transplanting in the early spring gives the seedlings time to establish roots before the heat of summer arrives. If transplanting in fall, aim for at least 4-6 weeks before the first frost to give the seedlings time to acclimate and establish a strong root system.
Preparing the Planting Site
Japanese Maples prefer well-draining, slightly acidic soil that is rich in organic matter. Choose a location with partial to full shade, as these trees do not thrive in full sun, especially in hot climates. If your soil is heavy or clay-like, amend it with compost or organic matter to improve drainage. Additionally, ensure that the planting area is sheltered from strong winds, as young trees can be vulnerable to wind damage.
Preparing the Seedlings
Before transplanting, gently remove the seedlings from their pots. Be cautious not to damage the delicate root systems. If the seedlings are root-bound (with roots circling the pot), carefully loosen the roots with your fingers to encourage outward growth once planted. For seedlings in small containers, you can transplant them directly, but for those in larger pots, it might be helpful to trim the roots a little before planting to prevent them from becoming too tangled.
Planting the Seedlings
Dig a hole that is about twice the width of the root ball and deep enough to accommodate the roots without bending them. Position the seedling in the center of the hole and ensure that the top of the root ball is level with the surrounding soil. Backfill the hole with soil, gently tamping it down as you go to remove air pockets. Water the area thoroughly after planting to help settle the soil and provide moisture to the roots.
Mulching and Watering
Once transplanted, apply a layer of mulch around the base of the seedling, but avoid piling it directly against the trunk. Mulch helps retain moisture, regulates soil temperature, and prevents weed growth. A 2-3 inch layer of organic mulch such as wood chips, straw, or bark is ideal.
Continue to water regularly, especially during dry spells, but ensure the soil does not become soggy. Japanese Maples prefer consistent moisture, but they don’t tolerate waterlogged roots. If rainfall is insufficient, deep watering once a week is often enough.
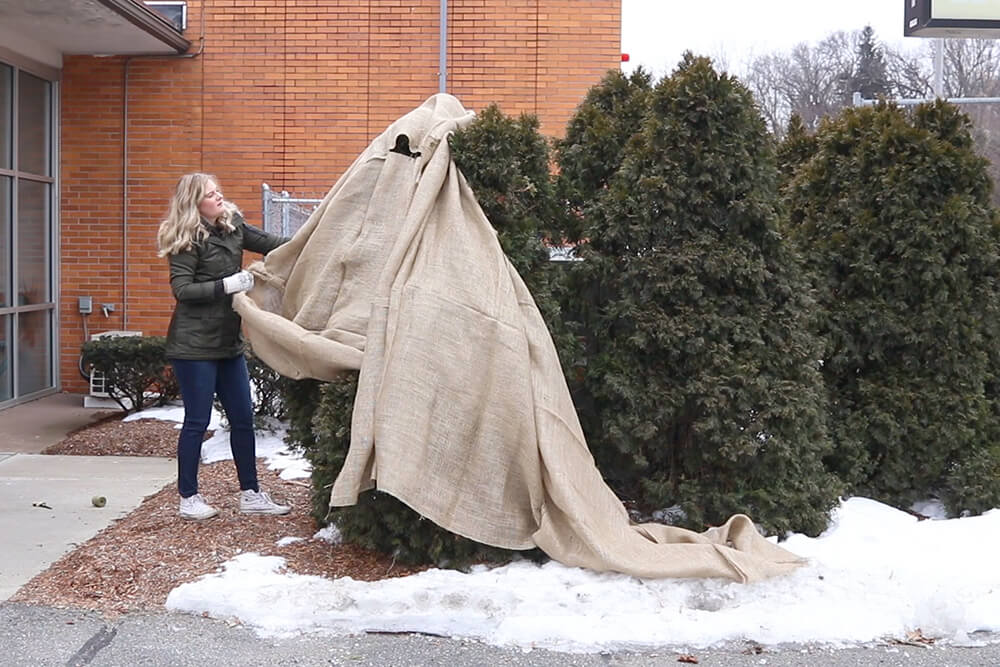
Caring for Transplanted Seedlings
After transplanting, the seedlings will need time to acclimate to their new outdoor conditions. Continue monitoring their water needs, and if there’s a risk of late frosts, protect them with row covers or frost blankets until they are fully established. Check for signs of transplant shock, such as wilting, yellowing leaves, or stunted growth. If transplant shock occurs, reduce stress by providing shade or temporarily moving the tree to a more sheltered area.
Ongoing Maintenance
As the seedlings grow, you may need to prune them to encourage healthy branching and maintain a pleasing shape. However, avoid heavy pruning in the first few years; focus on removing any dead or damaged branches. In subsequent years, shape the tree to promote good air circulation and an aesthetically balanced form. Keep an eye on pests and diseases and treat them promptly to prevent harm to the young trees.
Common Problems and Solutions
Growing Japanese Maple seedlings can sometimes present challenges, but being aware of common issues and how to address them will help ensure their success. Below are some of the most frequent problems you may encounter and practical solutions to resolve them.
Damping-Off Disease
Problem: Damping-off is a fungal disease that affects young seedlings, often causing them to wilt, collapse, and die. It thrives in moist, stagnant conditions.
Solution: To prevent damping-off, avoid overwatering and ensure the seedlings have adequate air circulation. Use a well-draining seed-starting mix and provide sufficient light to reduce humidity around the seedlings. If damping-off occurs, remove affected seedlings immediately and treat the remaining plants with a fungicide.
Leggy Growth (Etiolation)
Problem: Leggy growth occurs when seedlings grow tall and thin with sparse leaves, often due to insufficient light.
Solution: To prevent legginess, ensure your seedlings receive enough light—either from natural indirect light or supplemental grow lights. Increase the amount of light exposure by moving the seedlings to a brighter location or adjusting the grow light to be closer to the plants. If the seedlings are already leggy, you can pinch back the tops of the stems to encourage bushier growth.
Transplant Shock
Problem: Transplant shock can occur when seedlings are moved from pots to outdoor conditions, leading to wilting, yellowing leaves, or stunted growth.
Solution: Minimize transplant shock by transplanting during the right season—early spring or fall—when temperatures are mild. Before transplanting, water the seedlings thoroughly and avoid disturbing the roots too much. To help them acclimate, consider hardening off the seedlings by gradually increasing their exposure to outdoor conditions over a week. After transplanting, water regularly and apply mulch to help retain moisture.
Yellowing Leaves
Problem: Yellowing leaves may indicate a nutrient deficiency, overwatering, or poor drainage.
Solution: Check the soil for proper drainage and make sure you’re not overwatering. If the soil is soggy, reduce watering and allow the soil to dry out before watering again. If the yellowing is due to nutrient deficiency, especially nitrogen, consider applying a balanced, diluted fertilizer. If it persists, check for pests or diseases that might be affecting the roots or leaves.
Pests and Insects
Problem: Common pests that may target Japanese Maple seedlings include aphids, spider mites, scale insects, and caterpillars. These pests can cause damage to leaves, stems, and roots.
Solution: Regularly inspect your seedlings for pests. If aphids or mites are present, rinse the leaves with a strong stream of water or use insecticidal soap. For larger pests like caterpillars, remove them by hand or use an organic insecticide. Encourage beneficial insects, like ladybugs, which can help control pest populations naturally. Keep an eye on any changes in the leaves, such as holes or discoloration, to catch infestations early.
Poor Root Development
Problem: If the seedlings’ roots aren’t growing properly, it could lead to poor overall growth and weak plants. This issue can arise from root-bound pots or planting too deep.
Solution: If seedlings are in containers and show signs of being root-bound, gently loosen the roots before transplanting to encourage outward growth. When planting outdoors, ensure the root ball is level with the surrounding soil and avoid planting too deeply, which can suffocate the roots. Always choose appropriately sized containers for seedlings to prevent roots from becoming cramped.
Leaf Scorch or Burn
Problem: Leaf scorch or burn can happen if seedlings are exposed to too much direct sunlight, particularly in hot weather. This condition leads to dry, brown edges on the leaves.
Solution: To prevent leaf scorch, ensure your seedlings are placed in a location with filtered sunlight or partial shade. If they are being grown indoors, make sure the grow lights are not too close, and ensure that the seedlings are not exposed to intense sunlight without acclimation. Provide adequate humidity to help the seedlings tolerate brighter light conditions.
Wilting or Drooping Leaves
Problem: Wilting or drooping leaves can indicate inconsistent watering, root rot, or stress from environmental factors.
Solution: First, check the soil moisture. If it is too dry, water the seedlings deeply, ensuring that the soil is evenly moist. If the soil is waterlogged, improve drainage or adjust your watering routine to prevent root rot. If the seedlings have been recently transplanted, be patient and allow them time to acclimate, as wilting can be a sign of transplant shock. Ensure that the seedlings are not exposed to sudden temperature changes or drafts.