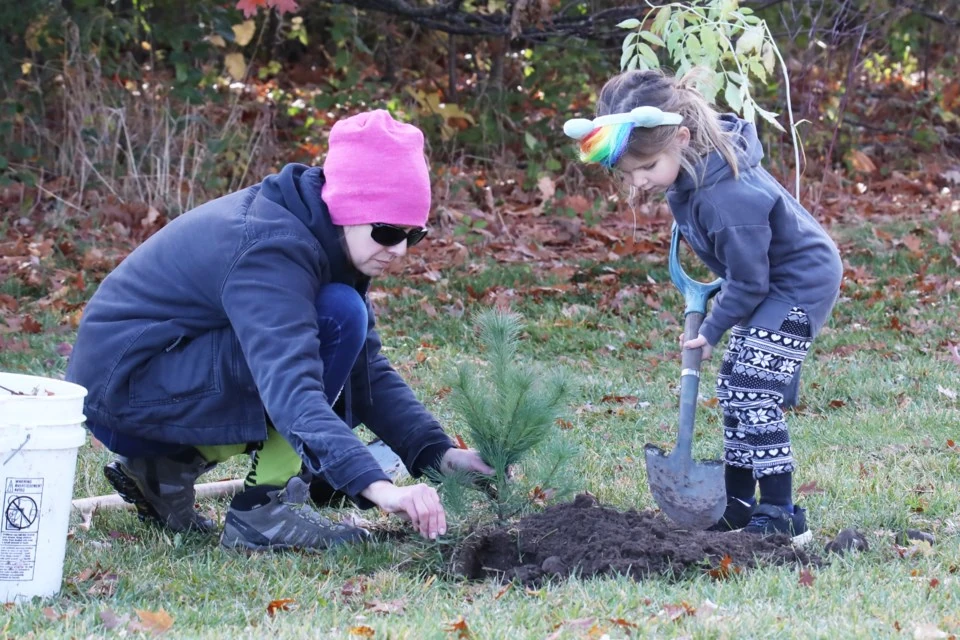
Successfully transplanting a tree is an essential gardening skill, particularly in colder climates where specific environmental conditions can pose unique challenges. This comprehensive guide outlines detailed, step-by-step instructions for transplanting a tree you’ve already chosen, ensuring its successful establishment and growth.
1. Understanding the Importance of Timing
Timing is crucial when transplanting trees, especially in colder climates. The ideal times to transplant are early spring, before new growth begins, or late fall, after leaves have fallen. During these dormant periods, trees are less stressed and better equipped to adapt to a new environment.
2. Preparing the New Site
Preparing the new planting site is vital for the success of the transplant. Here’s how to do it effectively:
- Clear the Area: Remove any weeds, grass, or debris from the site to reduce competition for nutrients and water. Clear a space that is at least three times the width of the anticipated root ball.
- Soil Assessment: Conduct a soil test to check pH and nutrient levels. Ideally, the soil should be loamy, well-draining, and rich in organic matter. Amend the soil as needed to improve fertility and drainage.
- Sunlight and Space: Ensure that the new location receives adequate sunlight and has enough room for the tree to grow to its full size. Consider potential shading from nearby structures or plants.
3. Gathering the Necessary Tools and Materials
Having the right tools and materials will facilitate a smoother transplanting process. Gather the following items:
- Tools:
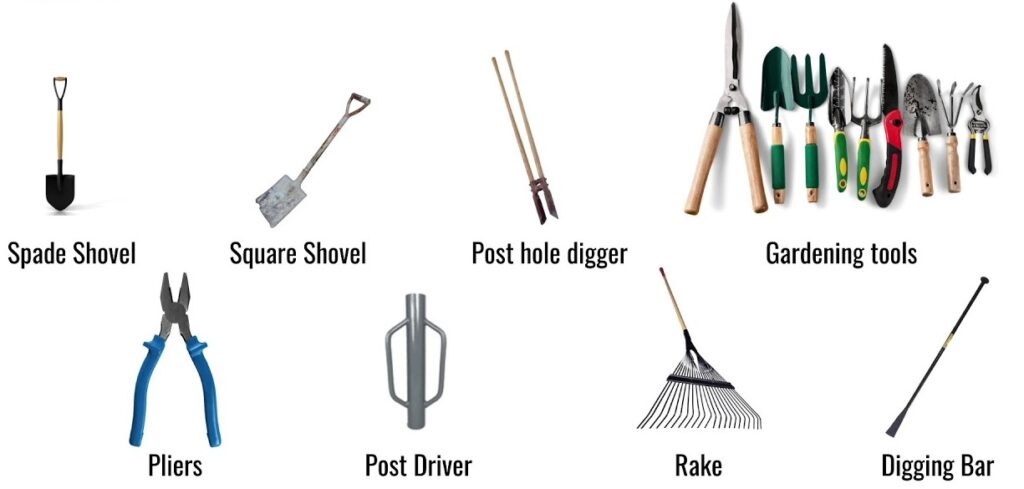
- Shovel or Spade: For digging and moving soil.
- Pruning Shears: To trim branches and roots as necessary.
- Watering Can or Hose: For watering the tree after transplanting.
- Tree Wrap: For protecting the trunk from sunscald, especially in the first year.
- Materials:
- Mulch: Organic materials like wood chips or shredded bark to help retain moisture and suppress weeds.
- Burlap or Landscaping Fabric: To wrap the root ball if needed.
- Organic Fertilizer: To promote root growth in the new location.
4. Transplanting a Tree Process: Step-by-Step Instructions
1: Assess and Prepare the Tree
- Health Check: Inspect the tree for any signs of disease or damage. Look for discolored leaves, dead branches, or signs of pests. Only transplant healthy trees.
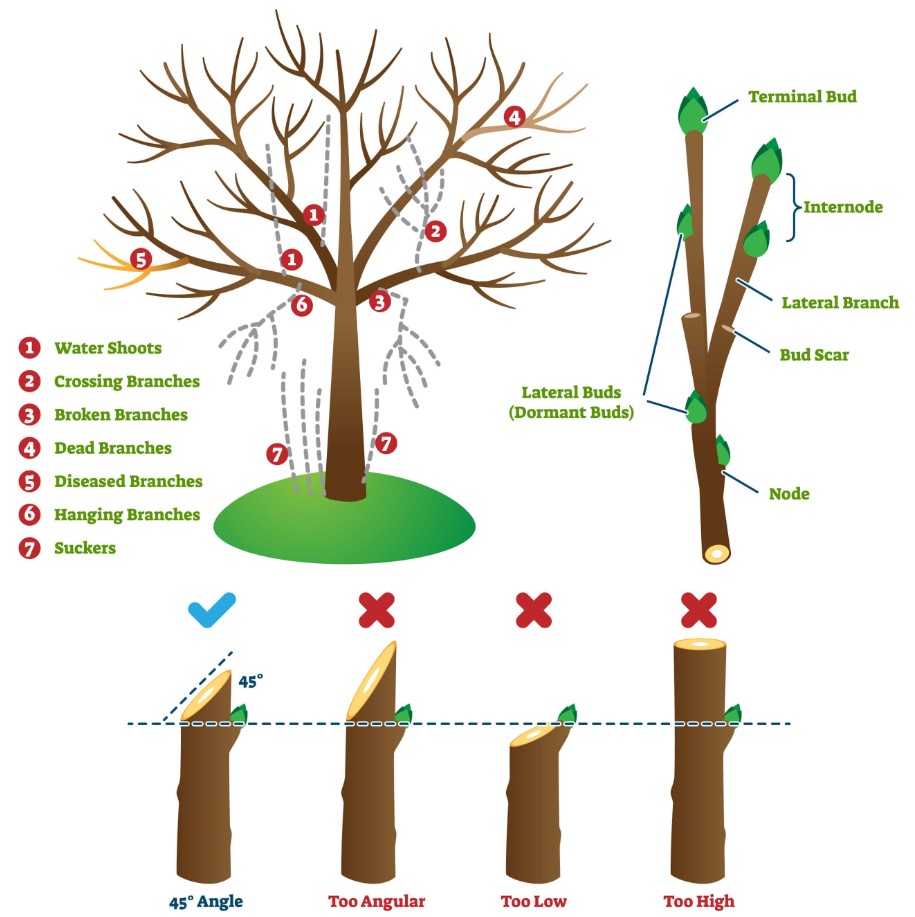
- Pruning: Trim any broken or unhealthy branches to reduce stress on the tree during the transition. Aim for a balanced shape to encourage healthy growth.
2: Digging Up the Tree
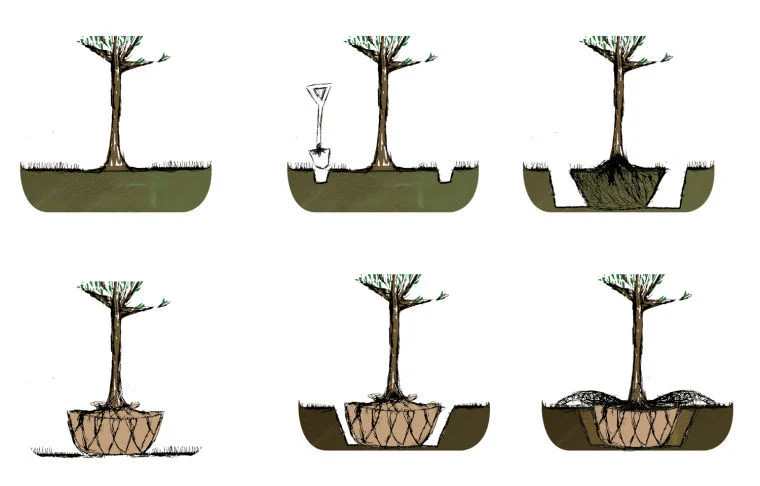
- Determine the Root Zone: Measure the trunk diameter at about 6 inches above the ground. For every inch of trunk diameter, plan for a root ball that is about 12 inches in diameter. For example, a tree with a 3-inch trunk should have a root ball of approximately 36 inches in diameter.
- Start Digging: Use a shovel to dig a trench around the tree, starting about 12 to 18 inches from the trunk. Dig down at least 12 to 18 inches to capture a good portion of the root system. Be careful to avoid cutting through large roots, as this can stress the tree.
- Lifting the Root Ball: Gently rock the tree back and forth to loosen the root ball from the ground. Carefully lift it out, ensuring that the soil stays intact. If necessary, wrap the root ball in burlap to keep it secure during transport.
3: Transporting the Tree
- Wrap the Root Ball: If the tree is large, wrap the root ball in burlap or plastic to keep the soil intact and protect the roots during transport. This is particularly important if the distance to the new location is considerable.
- Use a Tarp: Place the wrapped root ball on a tarp for easier transport. This helps prevent soil spillage and provides a stable base.
- Handle with Care: When moving the tree, avoid jostling the root ball to minimize stress and potential damage to the roots.
4: Preparing the New Location
- Digging the New Hole: Create a hole that is twice the width of the root ball and the same depth. This allows roots to spread easily into the surrounding soil.
- Loosening the Soil: Use a garden fork or shovel to loosen the soil at the bottom of the hole, which encourages root penetration and prevents compaction.
- Drainage Check: Ensure that the hole has good drainage. If water collects in the hole after rain, consider amending the soil or selecting a different location.
5: Planting the Tree
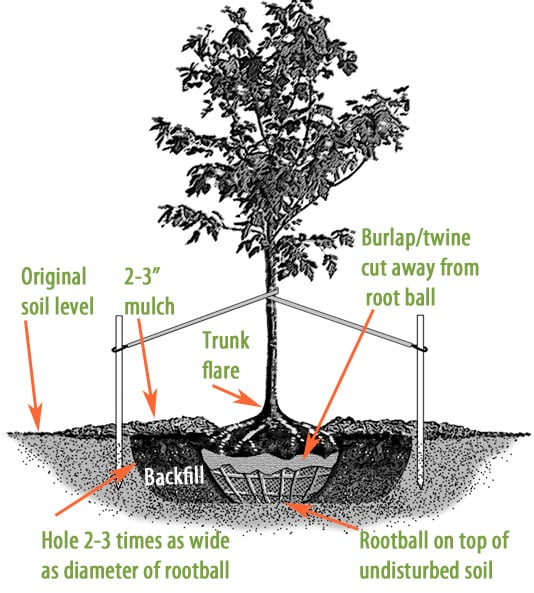
- Positioning the Tree: Place the tree in the center of the hole, making sure that the top of the root ball is level with or slightly above the surrounding soil. Avoid planting too deeply, as this can suffocate the roots.
- Backfill Carefully: Gradually backfill the hole with the original soil, ensuring that there are no air pockets around the roots. Water the soil as you fill to help settle it.
- Tamping Down: Lightly tamp the soil to secure the tree in place, being careful not to compact it excessively, which can hinder root growth.
6: Watering and Mulching
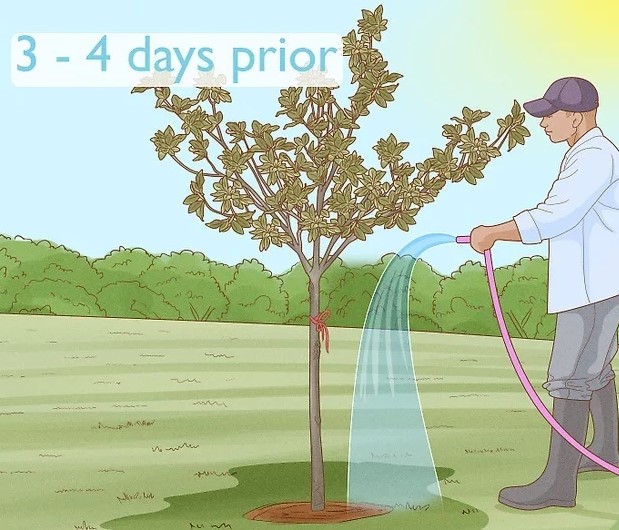
- Deep Watering: Immediately after planting, water the tree thoroughly. Aim for about 10 gallons of water for larger trees to ensure deep penetration into the root zone.
- Apply Mulch: Spread a 2- to 4-inch layer of mulch around the base of the tree, keeping it several inches away from the trunk. This helps retain moisture, regulates soil temperature, and suppresses weeds.
5. Post-Transplant Care
After transplanting, your tree will need ongoing care to help it establish itself:
- Watering: Establish a consistent watering routine, especially during the first growing season. Monitor the soil moisture and water deeply but infrequently to encourage deep root growth.
- Fertilization: In early spring, consider applying a slow-release fertilizer to provide essential nutrients. Follow the product’s instructions to avoid over-fertilizing.
- Monitoring: Regularly check the tree for signs of stress, such as wilting leaves or stunted growth. Address any issues promptly, whether they’re related to pests, diseases, or environmental stressors.
6. Common Challenges when Transplanting a Tree
Transplanting trees can come with challenges, particularly in colder climates. Here are some common issues and their solutions:

- Winter Stress: Trees may experience stress due to freezing temperatures and desiccating winds. Wrapping the trunk with protective materials can help mitigate damage from sunscald and frost.
- Pests and Diseases: Transplanted trees can be vulnerable to pests and diseases. Regular monitoring and early intervention with organic or chemical treatments can help protect the tree.
- Establishment Time: It may take several growing seasons for a transplanted tree to fully establish. Patience is essential, along with continued care and attention during this period.
7. Conclusion
Transplanting a tree in a colder climate requires careful planning and execution, but with the right steps, it can lead to a successful establishment and long-term growth. By following these detailed instructions, you can ensure that your chosen tree thrives in its new environment, enhancing your landscape for years to come. With attention to detail and ongoing care, your transplanted tree will grow strong and resilient, contributing beauty and ecological value to your garden.

